When I first started staining wood, I brushed it on like I was painting a room. This left the wood with an awful looking finish and it had a plastic feeling. Don’t make these same mistakes when learning how to stain wood.
Staining Wood
Staining wood is easy, but there are a few things that you should know before you get started. It is important to work in a well ventilated area or even better take your piece outdoors.
Most stains are typically oil based, so they have a strong odor. It is recommended that you wear a N95 mask and gloves while working with stains. Make sure to also prep your work space with a drop cloth to prevent any spills.
Items Used to Stain Wood:
- Rag or t-shirt
- Drop clothes
- Fine sandpaper
- Medium grit sandpaper
- Mouse Sander
- N95 mask
- Gloves
- Stain
- High Density Foam Roller
- Top Coat – Varathane Water Based Polyurethane
- Weathered Oak by Varathane
- Kona by Varathane
Custom Wood Stain Color
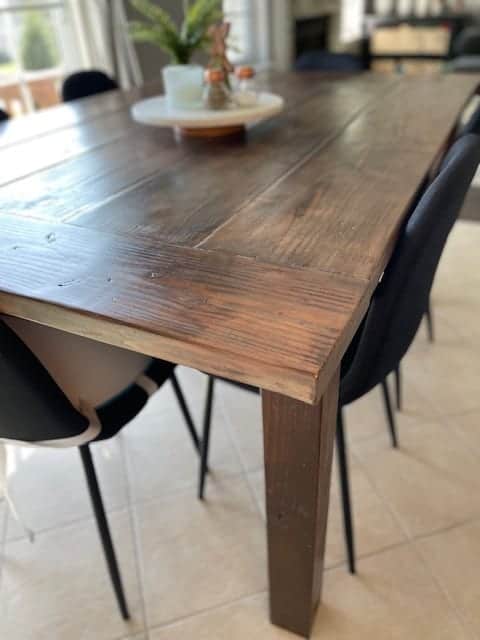
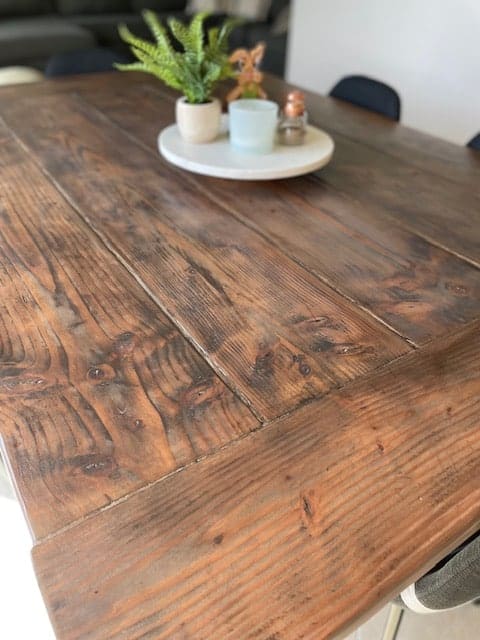
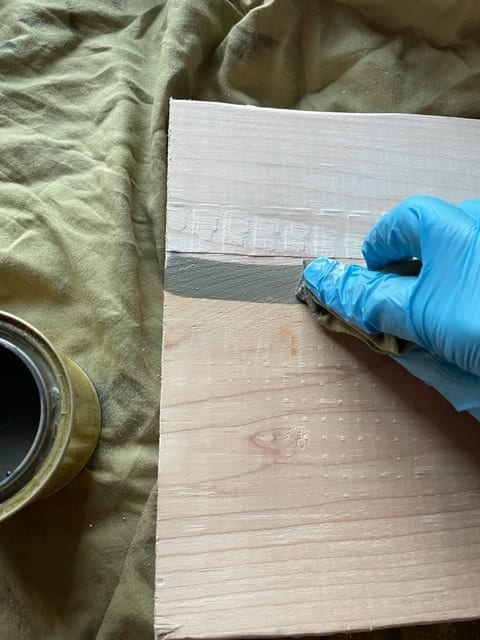
I used 2 different stain colors on my kitchen table to make my own custom color. First I applied the light stain then allowed that to dry before applying a coat of darker stain. This gave the kitchen table a distressed rustic look.

Wood Stain Colors
If you aren’t sure which stain color to go with, you might find this post on wood stain colors helpful. It is so tricky selecting the right stain looking at a tiny swatch, so I shared some of my stain projects to show stain colors in real life.
Related Posts
Prepping the Work Space
I tried to convince my husband to move this 500 lb kitchen table, but he wasn’t interested. Nagging him was helping, so I decided to tackle the project anyway because the table looked awful.
If you cannot take your item outdoors then make sure to remove as many objects from the space a possible.
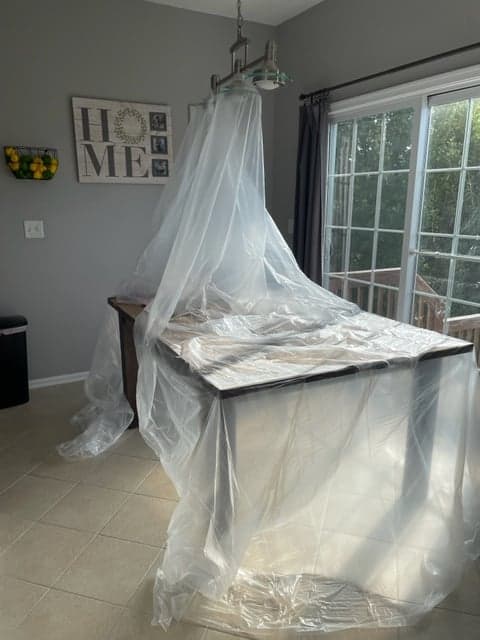
You would be surprised how much sanding dust flies around the room while working. So, don’t take a chance because it will probably end up covered in a thick coat of dust.
I also recommend covering things with tarps or making a tent over your item to contain as much dust as possible.
Always Sand Before Applying Wood Stain Color
I always recommend sanding and using wood filler, if needed before staining wood. Sanding before staining or painting is always worth the end result, even though it is messy and tedious.
Spend the time prepping instead of just jumping into the project or you might have to redo your project like me. If the wood that you are staining is in bad shape, you should start with a coarse sandpaper then work your way to a fine sandpaper.
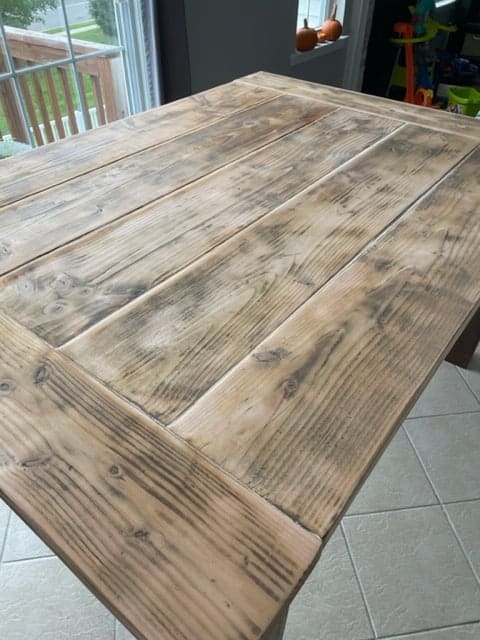
A good quality piece of wood will only require a light sanding with fine sandpaper should do the trick. After you sanded down your item, use a dry rag to clean off any dust and debris.
How to Stain Wood
Now that you have properly prepped your work place and sanded your wood, it is time to stain. To get started with staining wood you will need an old t-shirt or a rag to apply the wood stain color.
Cut a section of the t-shirt then fold the piece of scrap fabric into a square. Lightly dip a corner of the square into the can of stain then apply a thin coat of stain to the wood.
Always go with the grain of the wood when staining and use long strokes with light pressure. Avoid using too much pressure or the stain will look uneven or end up darker than you planned on.
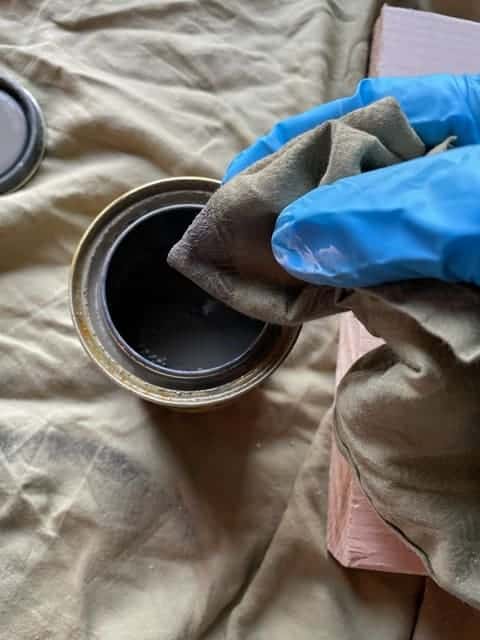
After using all of the stain on your square piece of fabric, go back over all of the areas to wipe the stain off. Then dip the square in the stain and continue the same process until the item has been completely covered.
Once you have completely stained your item, let the wood dry for a few hours or overnight before applying any additional coats.
If you are satisfied with the look of your wood after a single coat of stain then you can stop. Most stains need a total of 2 coats, so you will follow the same steps to apply the 2nd coat of stain.
The Best Clear Coat for Wood
I have used stains with polyurethane mixed in, semi gloss polyurethane, and water based satin polyurethane to protect wood. Stains with poly mixed in do not provide enough protection in my opinion and they do not stain evenly.
After using my favorite Kona stain without poly mixed in, I noticed the stain turn out differently compared to Kona with poly. The stain without poly mixed in looked more even and was felt easier to blend. So, I recommend using a water based satin polyurethane over a stain with poly mixed in.
How to Apply Clear Coat
Next I applied 2 thin coats of water based satin polyurethane to protect the wood stain. The clear coat should be rolled on with a high density foam roller in thin layers. Never apply thick layers of clear coat or it might cause bubbling and dry with a sticky plastic look.

Conclusion
The table didn’t come out exactly how I was thinking, but I absolutely love the final result. Maybe that’s because I realized how much hard work went into this table.
Either way, I am really pleased with how it turned out and after all that sanding this table is super smooth. Remember that DIY doesn’t always go as planned and isn’t as easy as it appears.