
Easily make a DIY jewelry storage from from scrap flooring and a large picture frame. Organize jewelry like a work of art with this repurposed project!
Jewelry Storage Made from Scrap Flooring
Instead of spending a money on an expensive jewelry display, you can make your own for for less than $20 or even for free!
It’s as simple as cutting the pieces of wood to fit into the picture frame and adhere it to the frame. Lastly, drill holes for the hooks to organize necklaces, bracelets, and earrings on your jewelry frame.

STEP 1: Select Materials for the Frame
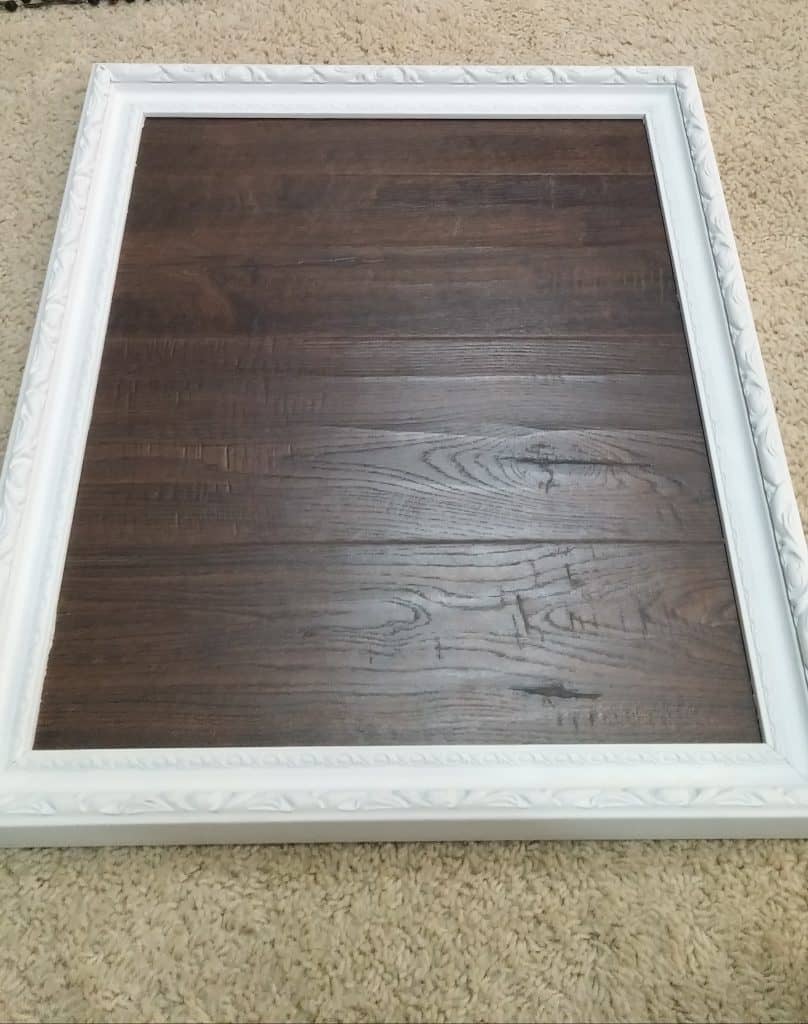
The picture frame will obviously dictate what size pieces of wood you need to cut. You really can pick whatever frame you want.
I recommend using a lighter picture frame with darker wood or a darker picture frame with lighter wood.

If you do get a wood grain frame, make sure it won’t clash with the wood. We had an elegant picture frame, which worked really well.
You also want make sure the picture frame is big enough to hold a good bit of jewelry.
Lastly, you want to make sure the frame itself has some depth or thickness to it so the wood can fit nicely and won’t push the frame off of the wall.
Basically, you don’t want the wood thicker than the frame itself.
STEP 2: How to Adhere the Wood to the Jewelry Frame
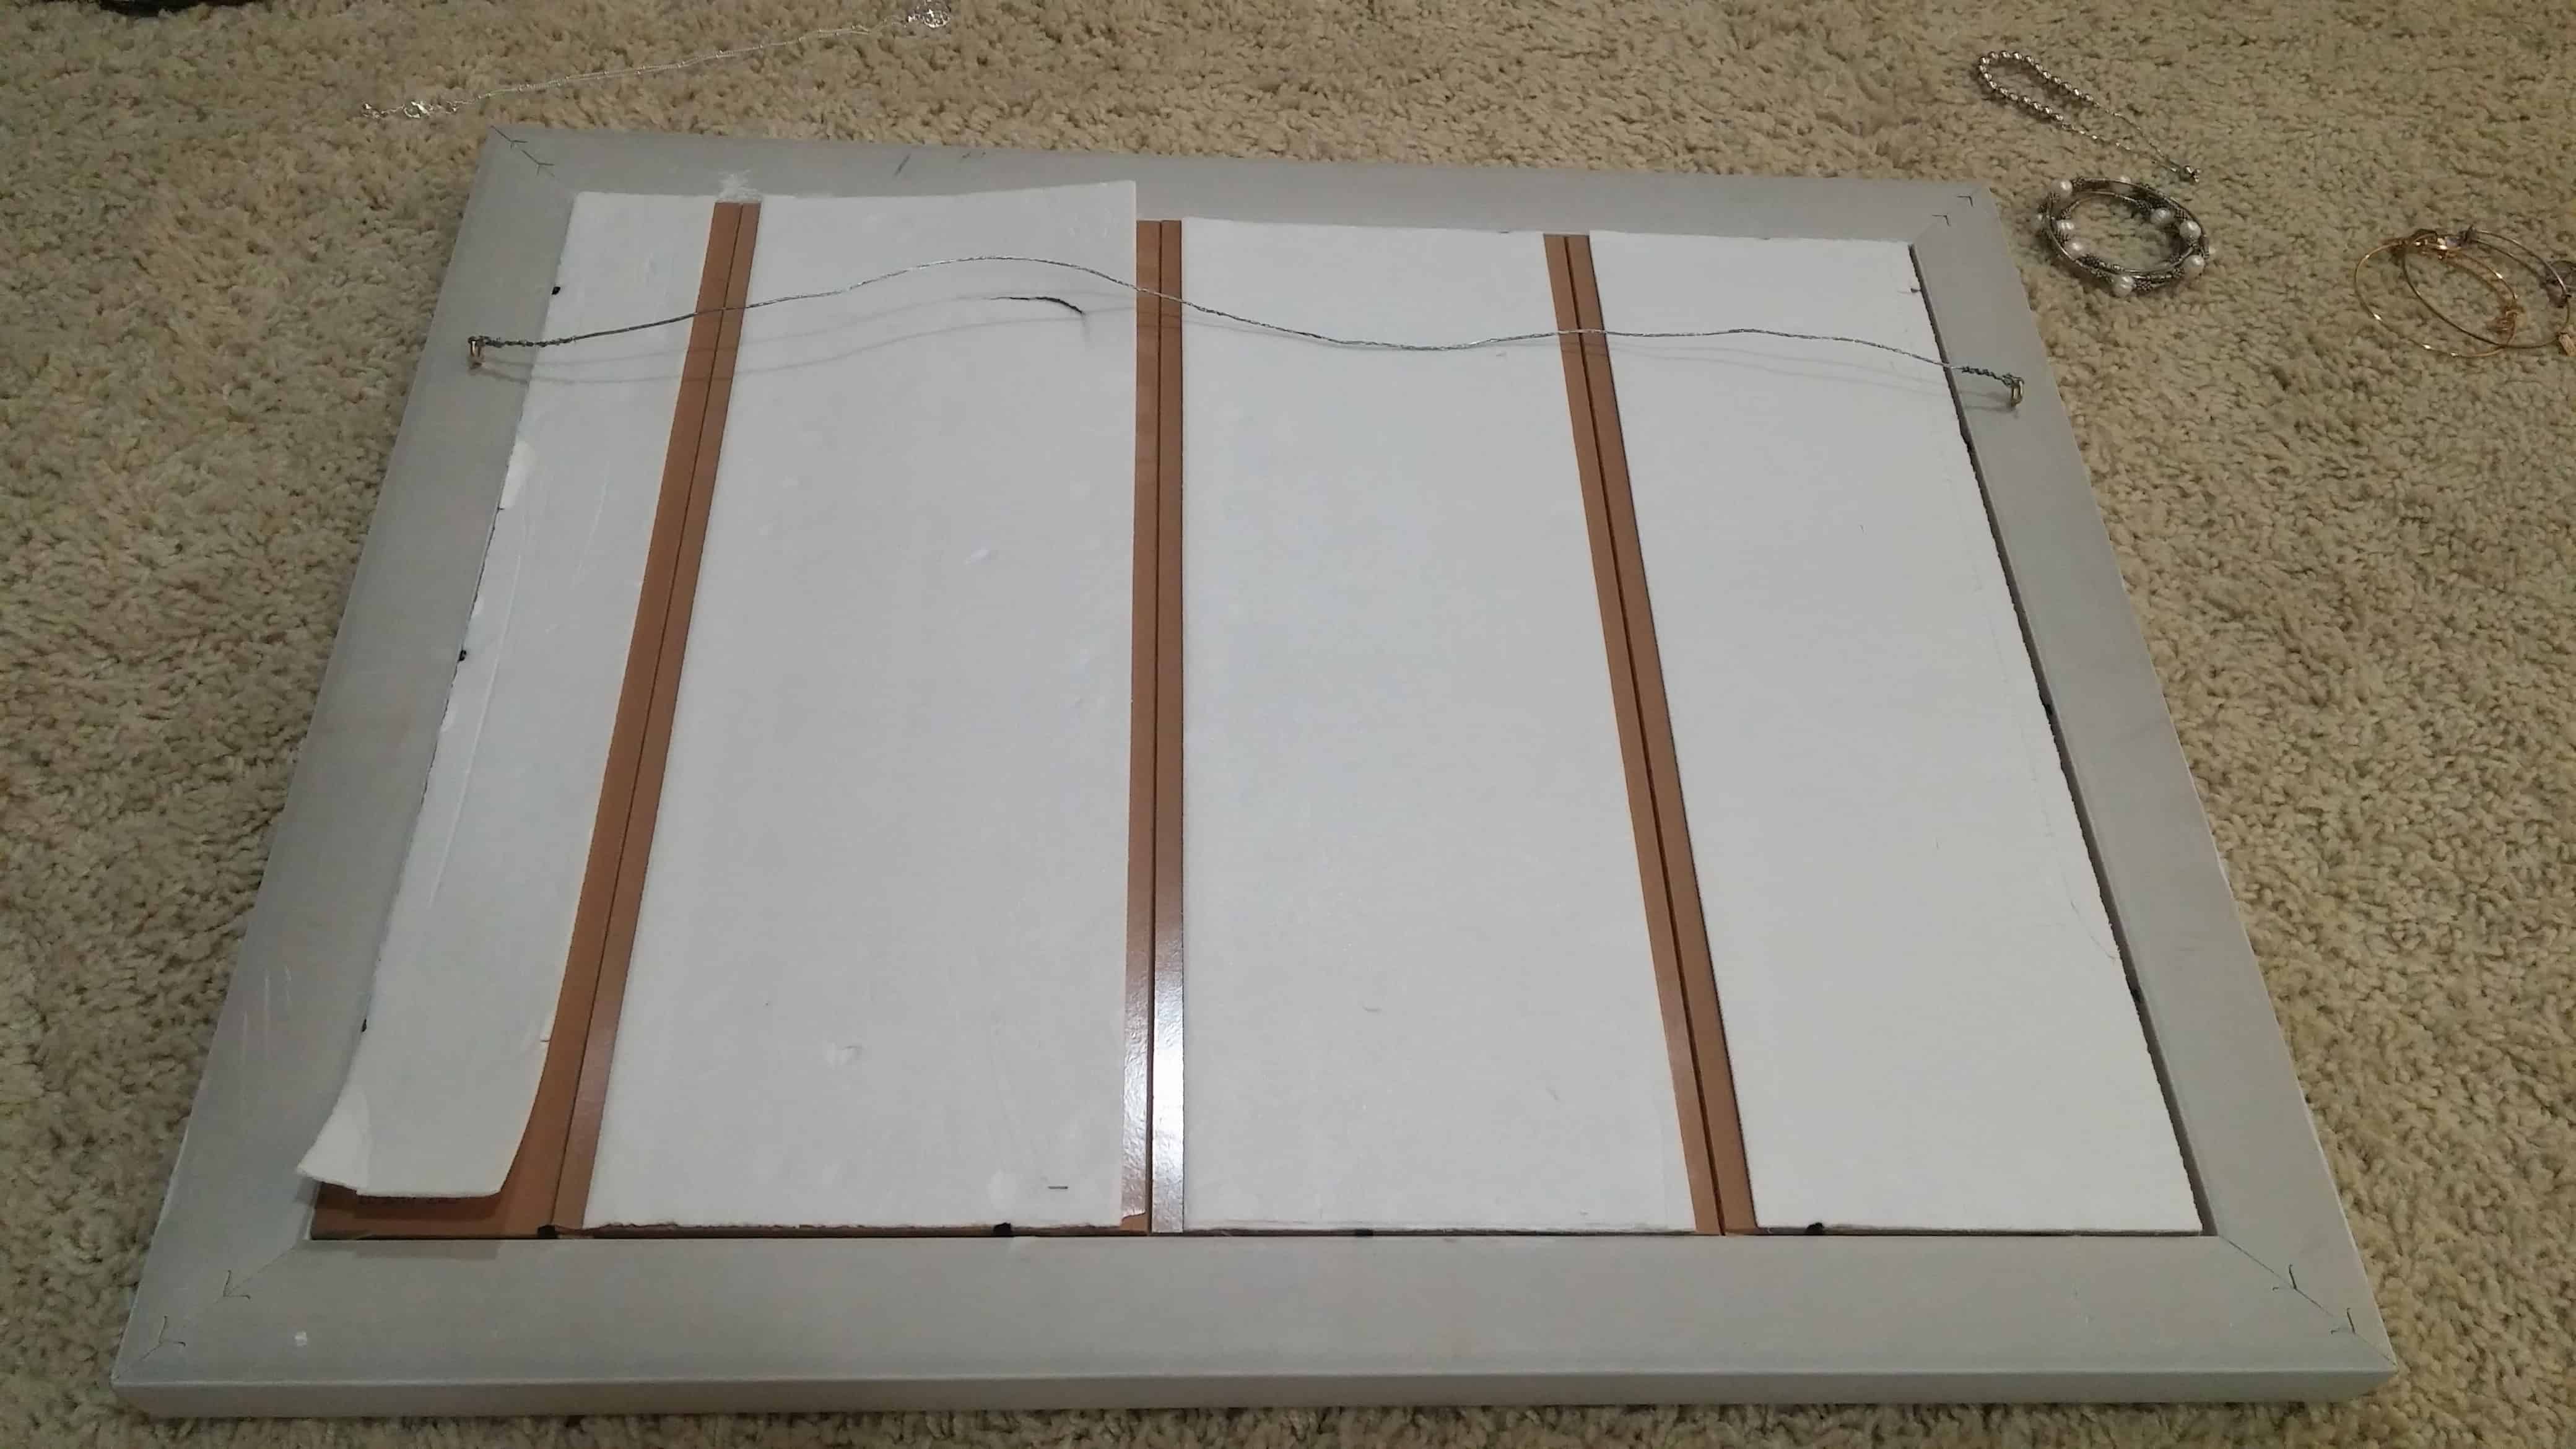
You really can use any wood you want as a background, even oak/birch plywood, or peel and stick.
I went with snap and click Pergo planks because it’s what I had lying around from a previous project.
The nice thing about using peel and stick is that you can cut this with a box cutter or good quality scissors.
Cutting Peel and Stick: Peel and stick is typically thinner, so you may need to put cork board or plywood behind the peel and stick.
I simply measured the inside of the frame and cut some pieces to fit. Then I snapped the wood planks together as one unit and made sure they fit into the frame.
After doing a test fit, I put a bead of silicone around the inside of the frame where the wood makes contact with it.
Glue: If you prefer not to use silicone, you could trying using hot glue instead.
Make sure there’s some weight on it or something pushing it down to make sure it makes contact with the silicon (or whatever adhesive you want). I let it sit until dry.
In the picture above, the planks still had the built in padding on it (since it was meant for a floor), but I scraped it off later with a putty knife.
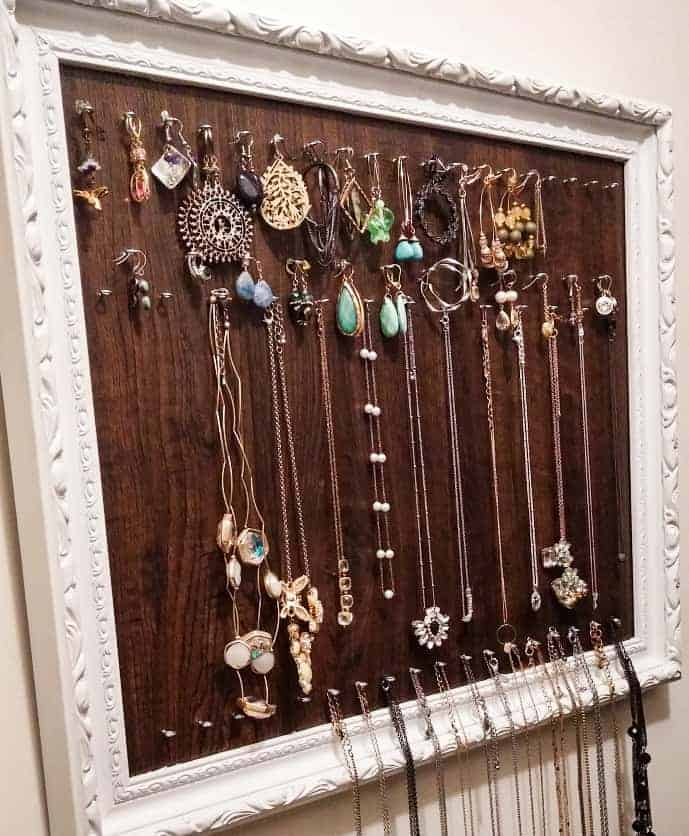
STEP 3: Adding Hooks to the Jewelry Storage
Now it’s time to use screw eyes or hooks to hold earrings, necklaces and bracelets for your jewelry storage. Depending on the color of your flooring, you can compliment the flooring with the metal hooks.

For a warmer look, opt for brass hooks or a cooler look with silver hooks. You may even be able to find black hooks and can mix in long cabinet pulls for easier earring storage. Get creative with the hooks to best suit your jewelry storage needs.
To adhere the hooky eyes, I used a ruler to draw straight lines and then marked and drilled holes every inch. Make sure you drill a test piece first so you know you’re using the right size for the screws, otherwise the screws eyes won’t be tight enough and fall out.
The second row was staggered so that the jewelry didn’t dangle over each other. I had rows for earrings, short necklaces, and long necklaces, but again, you can customize this as much as you want.
If you have a lot of bracelets than you might be interested in this other bracelet organizer ideas.
Conclusion
A jewelry frame display would be a thoughtful gift or a fun way to display your own jewelry.
It is a great DIY jewelry frame organizer and display for all different types of jewelry. If you enjoyed this project you might like this other creative idea to make basket wall art from chargers.