
This wooden snowman project is fun for kids to make from scrap wood. Get creative with things that you already have on hand, so you don’t have to spend any money.
Use an old sweater, leftover felt from a previous project, and shop the dollar store for items to make these cute snowmen!
Making a Scrap Wood Snowman
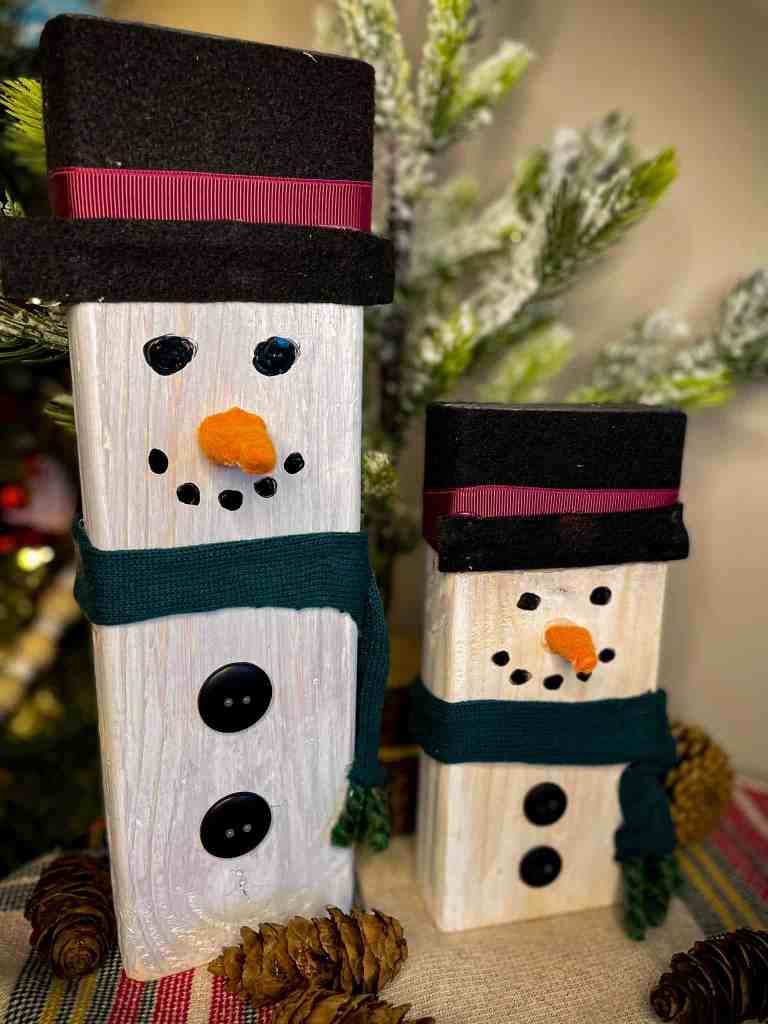
To make a wooden snowman, first cut 2x4s to length for each snowman then sanded them down. The taller snowman that I made is about 10 inches tall and the smaller snowman is about 7 inches tall. These can be made to any height and they stand on their own.

After sanding the snowman I gave them a light brown stain and let the stain dry overnight. Once the stain was dry, I went over the stain with white wash to give the snowmen a rustic look.
How to Make White Wash
To make your own white wash, simply select a white paint and a cup then mix a little bit of water at a time.
Slowly add water into the paint until you have the right consistency. You do not want the paint to be too watery or too thick, so aim for a milky consistency.

To apply the whitewash, use a brush or a dabber and lightly brush the whitewash onto the wood. Then quickly wipe the whitewash off of the wood before the paint dries.
Decorating Scrap Wood Snowmen
Once your wooden snowman has been painted and dried, it is time to add a hat and scarf. To make the hat, I cut black felt to size and wrap it around the top of the wood.
Then I upcycled an old bridesmaid dress by cutting the ribbon off of the dress for the snowmen hat.
I wore this bridesmaids dress when I was 9 months pregnant, so there was no way I was wearing this thing again.
Then I wrapped ribbon around the hat before attaching a small piece of black felt on the front of the hat.
Snowman Scarf
Next I cut up an old green sweater that and turn it into a scarf for the snowman. Once you have the material for the scarf cut to length, either tie the scarf around the wood or hot glue the scarf in place.
I found it easier to place the scarf where I wanted it to lay then I glued it in place. After the scarf is dried, add yarn to the bottom of the scarf or cut the fabric into strips.
You might like our other scrap wood projects to save money on decor and prevent waste.
Making a Snowman Nose
I tired to get creative with scrap quarter round for a carrot nose, but it just looked weird. So, I grabbed aluminum foil and rolled it up and cut it to size for a carrot nose.
Once I had the correct length for the nose, I wrapped the foil with orange felt and hot glue the felt in place Then I hot glued the carrot nose in place, and started working on the eyes, mouth and buttons.
Adding the Snowman Eyes
I did not have enough small buttons on hand for the mouth and eyes, so I just used scrap black paint that I had in my basement.

Simply just paint on small circles for the mouth and eyes then hot glue larger buttons onto the belly of the snowman.
Conclusion
These wooden snowmen stand up on their own on a flat surface, so I did not attached a stand to the bottom of the snowmen.
I hope your family enjoyed making a wooden snowman, and display it each holiday season! If you are looking for even more DIY snowman ideas, you will love this super cute stacked block snowman!