
Struggling to store your decorative yard stakes? This easy DIY garden stake organizer is the perfect way to use up scrap wood and neatly store outdoor seasonal decor.
Why Build a Garden Stake Organizer?
While it’s fun to display garden stakes in your yard, storing them can be tricky. I had a pile of metal signs with no good place to put them. Usually, my husband handles the building, but this time I picked up the power tools myself—and I’m glad I did!

This is a great beginner-friendly woodworking project. You’ll gain confidence with tools while repurposing leftover wood. Feel free to adjust measurements and materials to work with what you already have.
Step 1: Choose Your Wood
Start by measuring your garden stakes to determine how big the stand needs to be. I used a mix of scrap 2×12, 2×3, and 2×2 wood, but you can substitute with plywood or multiple boards joined together.
Lay out your wood on the floor before cutting to visualize the project and plan screw placements.

Step 2: Build the Base
I used a 2×12 cut to 23 ¼” for the base, slightly wider than my largest sign. If you don’t have a wide board, piece together a few smaller ones.

Step 3–4: Legs & Supports
- Cut four 2x3s at 29″ tall for the legs (adjust based on your stake height).
- Cut four 20″ 2x2s for top and bottom side supports.
- Cut two 8″ 2x2s for the side braces to help hold the stakes in place.
Step 5–6: Assemble & Organize
Screw everything together. You can optionally drill holes into the base to anchor the stakes, but mine stood upright without it.
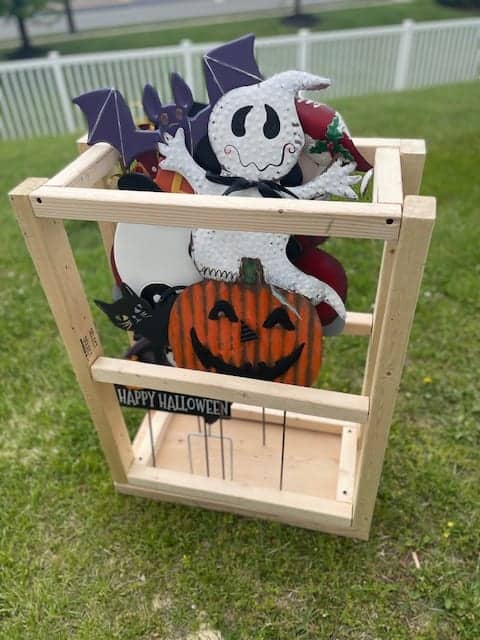
I fit four large metal signs with room for more—up to 8 garden stakes total. You can make a second organizer or extend the base for extra capacity.
Final Tip: Don’t toss those scrap pieces—you can organize tools, yard gear, or build more storage with them!