
Struggling to decorate a large wall in your living room? I had the same problem, so I built a simple long picture shelf to display art and home decor. For only about $20, you can make your own customizable shelf—or two smaller ones—to fit your space and style.

Materials & Cut List
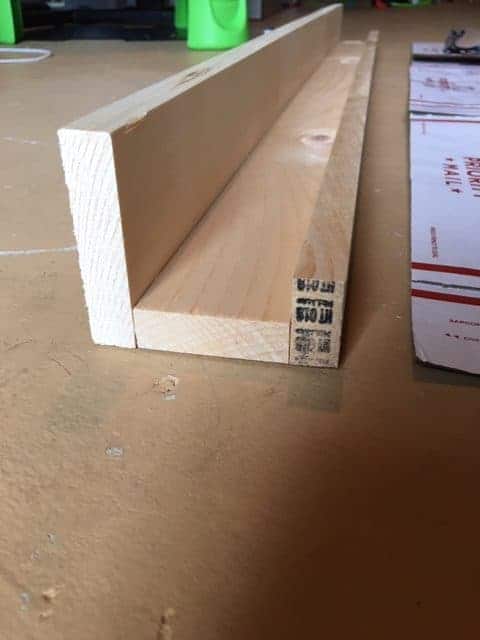
- (1) 1×4 common board @ 8 feet (back piece)
- (1) 1×3 common board @ 8 feet (shelf)
- (1) 1×2 common board @ 8 feet (front lip)
- Wood glue
- Nail gun + 15-16 gauge brad nails (or finish nails)
- Sandpaper or mouse sander
- Stain (e.g. Varathane)
- Gloves, mask, rag/old t-shirt
- Polyurethane (water-based)
- Drywall screws (2½ inch), stud finder, level
Note: Common boards are labeled 1×4, 1×3, etc., but are actually slightly smaller. Pine is a good, budget-friendly option.
How to Build a Picture Shelf
- Cut and Assemble:
- Decide on the shelf length: one 8-ft shelf or two 4-ft shelves.
- Attach the 1×2 to the edge of the 1×3 using wood glue and brad nails.
- Then attach the 1×4 to the back side of the 1×3 to complete the ledge structure.
- Sand the Shelf:
- Sand the shelf to remove splinters and smooth the surface.
- Start with medium grit and finish with fine grit sandpaper.
- Wipe clean with a rag to remove dust.
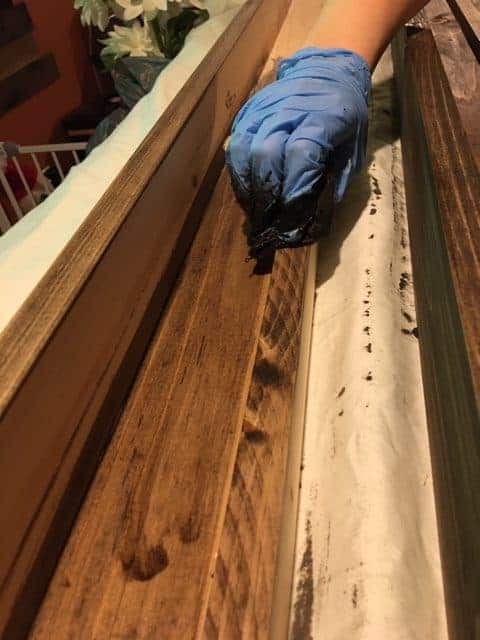
- Stain and Seal:
- Apply stain in the direction of the wood grain using a rag or brush.
- Let sit for a few seconds, then wipe off excess.
- Apply 1–2 coats based on desired color (I used Varathane for a darker tone).
- Once dry, apply a thin coat of polyurethane for protection.
How to Mount Picture Shelves
- Use a stud finder to locate studs.
- Pre-drill holes through the 1×4 backing into the studs.
- Use drywall screws and a level to secure the shelf.
- An 8-ft shelf should hit 4–6 studs; a 4-ft shelf should hit at least 3.

Final Thoughts
This budget-friendly weekend project is perfect for filling a blank wall. These DIY picture shelves are stylish, functional, and easy to update with new decor over time. Give your space a quick and timeless upgrade!