
Are you thinking of buying Pergo flooring, but don’t know where to start with the install? These tips and tricks will remove the overwhelming feeling from your Pergo flooring installation.
Why We Chose Pergo Laminate Flooring
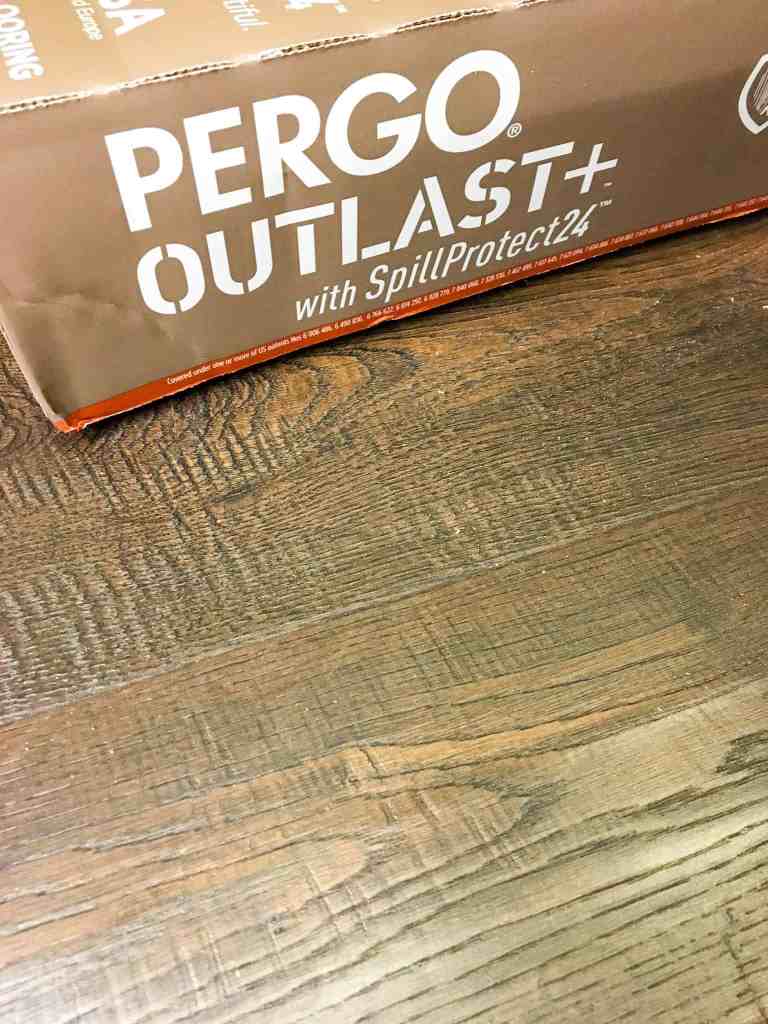
Pergo floors are easy to install for beginners and very durable snap and click laminate flooring that will last. Most Pergo laminate flooring has built in padding, so you can put these right on top of your subfloor.

Items Required for Pergo Flooring Installation:
- Pergo Flooring
- Miter Saw
- Laminate Flooring Cutter
- Install Kit
Removing the Existing Flooring
Before your Pergo flooring installation, you will need to remove the existing flooring and thoroughly clean the space. Ripping up carpet is easy, it just takes some muscle and patience to get it all removed. Typically removing the carpet, eliminates odors and stirs up lots of dust.
If you notice that your subfloor has odors like mine did, you may need to give them a good cleaning before your Pergo flooring installation. Now that your old flooring has been removed and subfloor is clean, its time to start installing Pergo flooring.
Tips Remove Baseboards
At this point, it’s up to you if you want to pry off the existing baseboard and lay new ones. My baseboard was fine, even though the boards didn’t fit underneath it.
I knew I could cover the gaps in this space with quarter round after my Pergo flooring installation. Quarter round is an additional piece that is installed below the baseboard to cover gaps.
If you remove the baseboards, you will have to go along the edges to separate the caulk. Work on prying the baseboard away from the wall with a pry bar.
Sometimes you need to tap it with a hammer to get the pry bar behind the baseboard. Once the pry bar is behind it, carefully pry it away from the wall then remove any nails that remain afterwards.
How to Prevent Gaps in Flooring
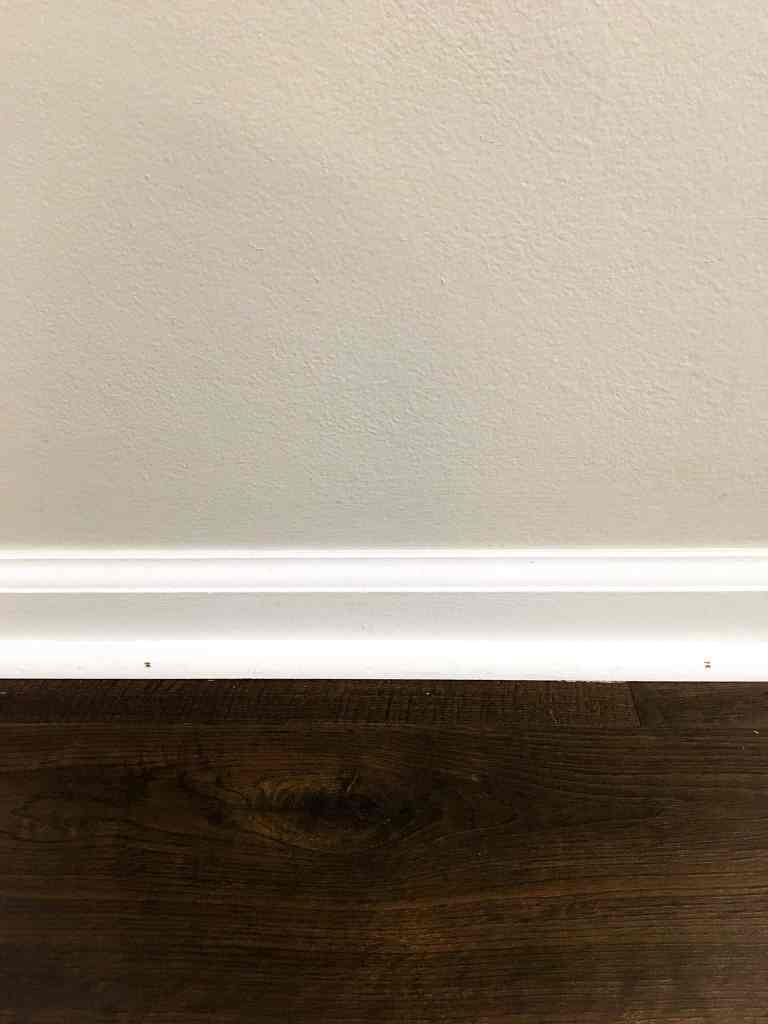
To prevent gapping in flooring, the floors should be installed with a minimum of 1/4 expansion gap. If you don’t leave a gap in between the wall and your boards, they will expand.
This means the the space between the wall and newly installed floor should be at least 1/4 inch. This expansion can cause the floor to lift in some spots, creating waves and gapping in your floor.

Whether you’re dealing with real wood, bamboo, or Pergo flooring, this is where a lot of people go wrong. So, make sure to leave the proper spacing during your installation.
It is not 6 years after my Pergo flooring installation and there are zero gaps, buckling, or lifting in my floor. This is after numerous hot, humid summers, and ice cold winters, when the boards typically expand and contract.
Common Mistakes During Pergo Flooring Installation
Mistake 1 – Acclimation
Not acclimating the floors for 48 hours! It is so important to acclimate the Pergo Outlast before installation. The Pergo should be left in the packaging and store in a room between 59-68 degrees with a max humidity of 70%.
Mistake 2 – Level Subfloor
Not checking the levelness of subfloor! The subfloor must be checked carefully in several spots to make sure it is level before laying the Pergo flooring down.
Mistake 3 – Spacers
Not using spacers against the wall! Spacers help keep the flooring in place during installation. The spacers are so important to prevent the floor from being too close to the wall.
If the floor is too close to the wall then you will not have enough room for expansion, which may cause gaps in your flooring. Floors should be installed with an expansion gap of at least 1/4 of an inch from the wall.
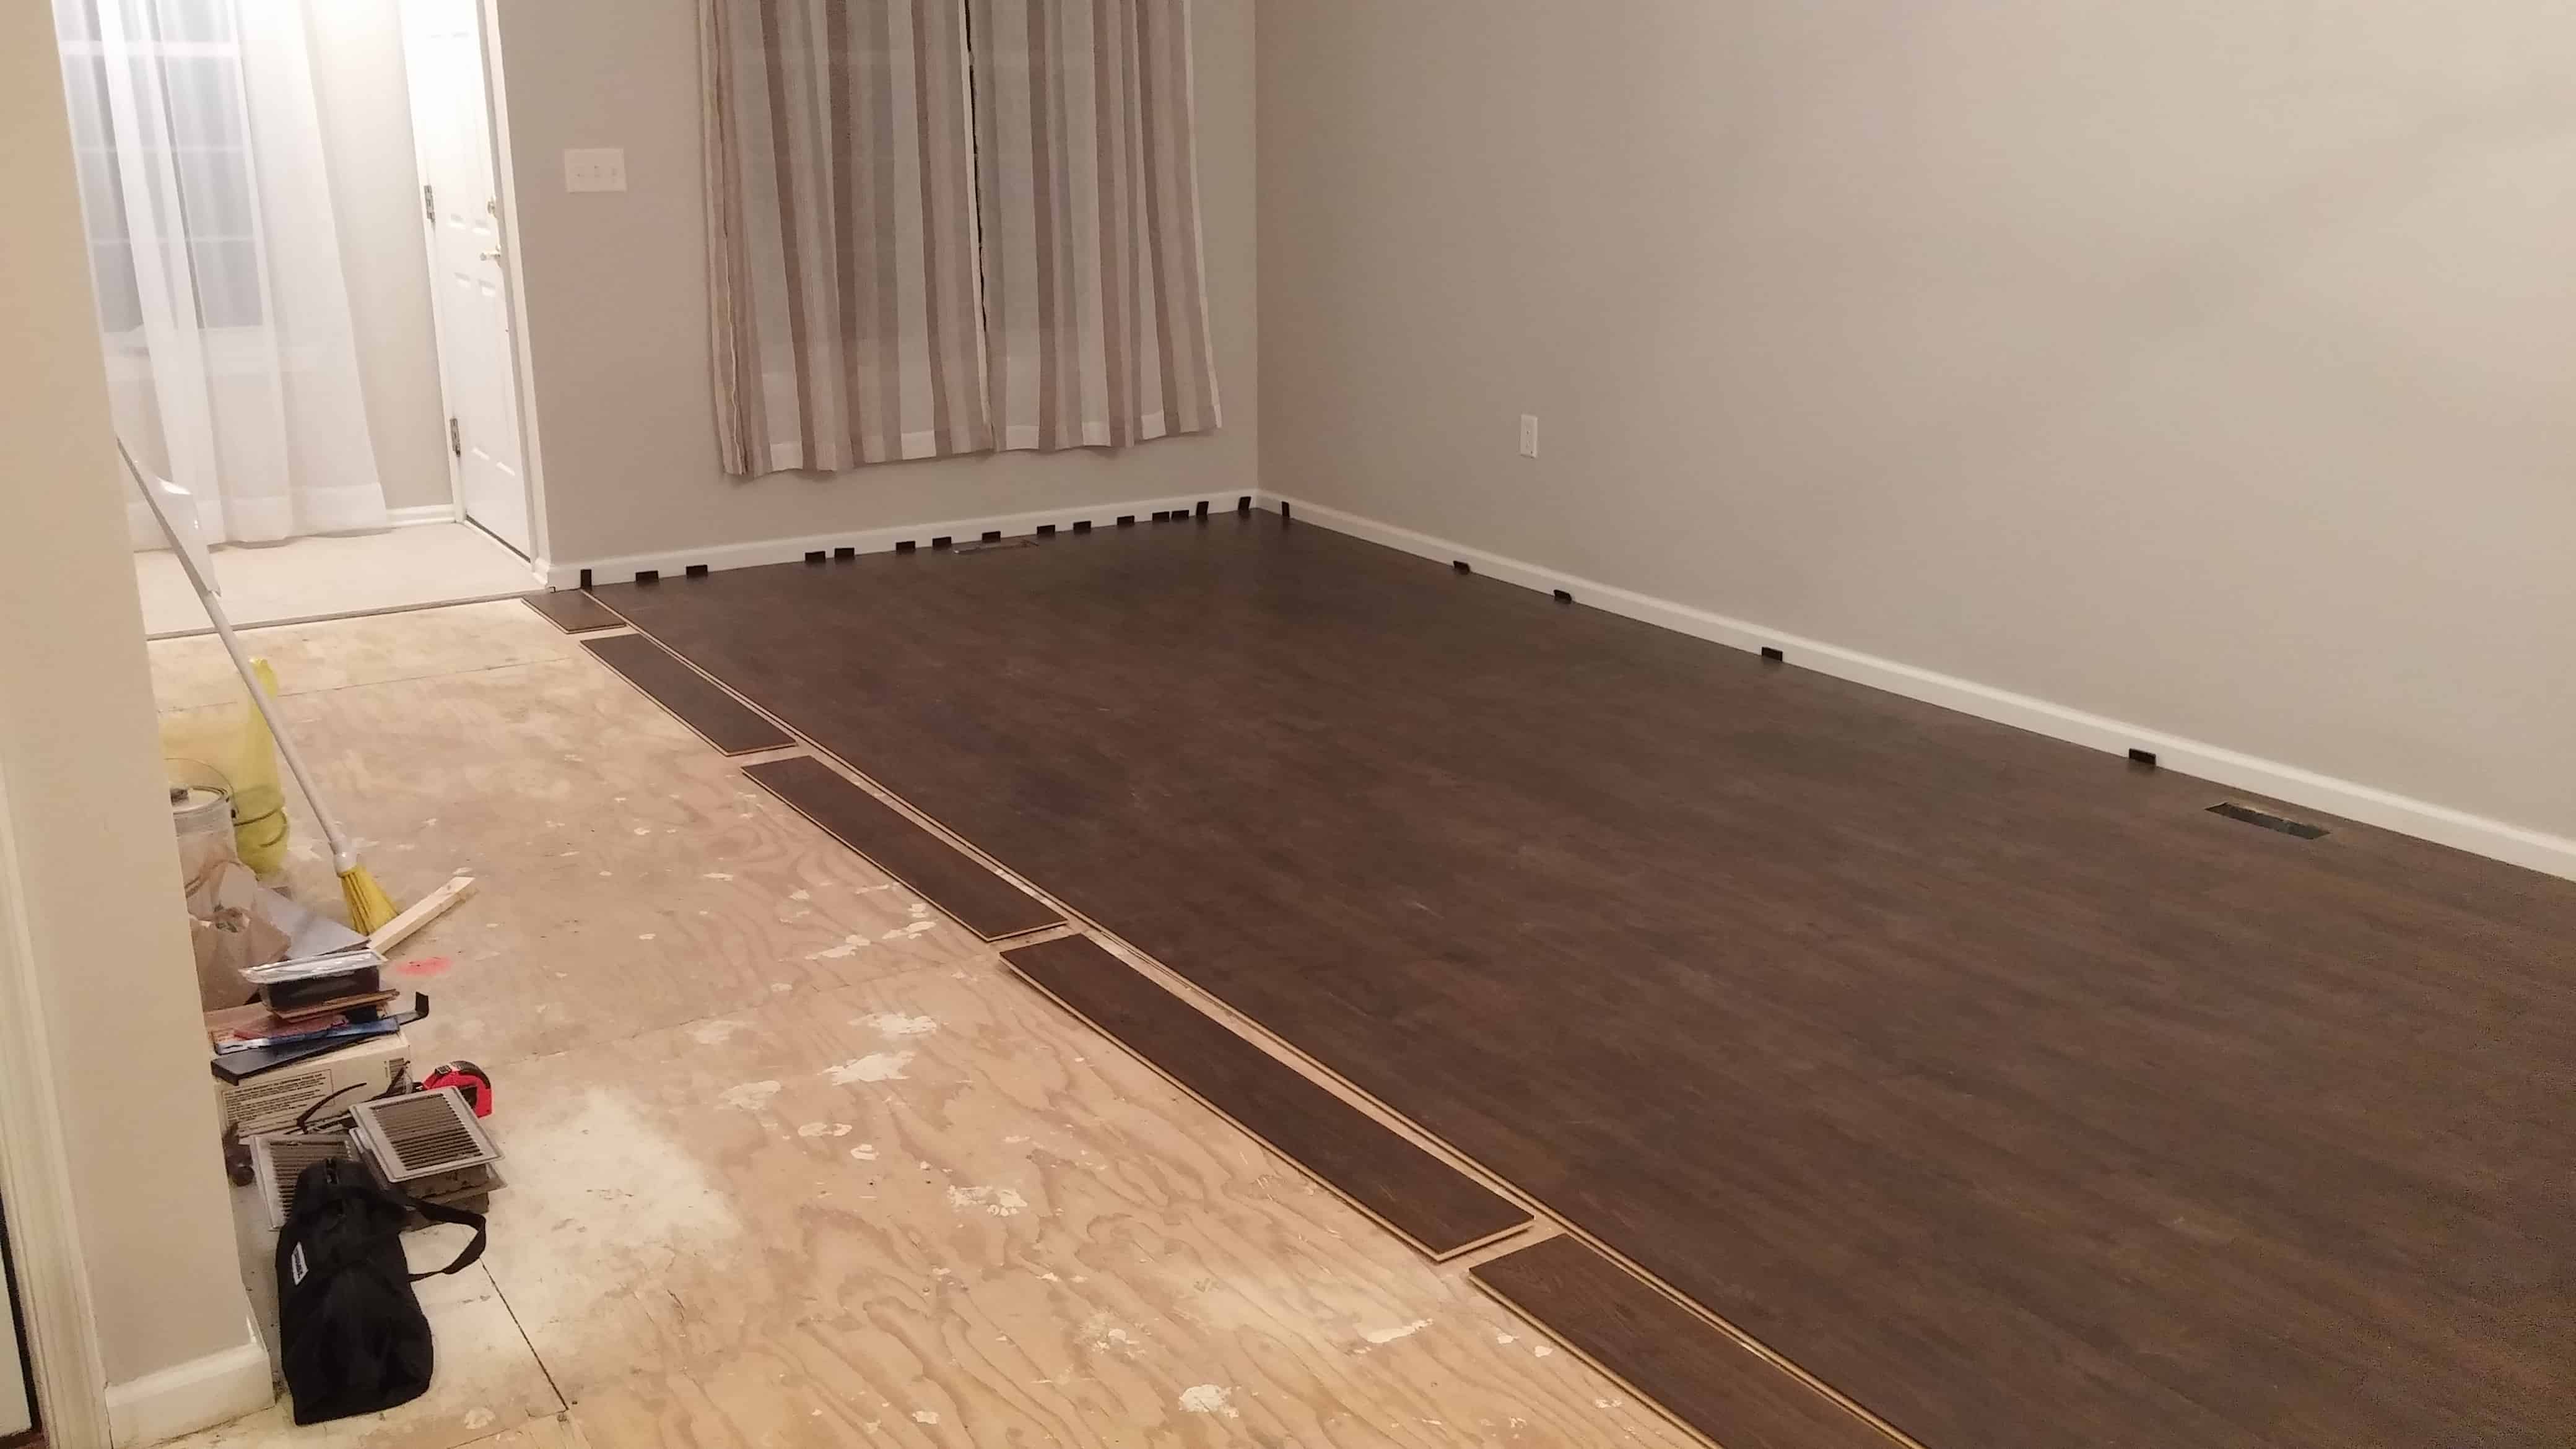
How to Snap and Click the Boards
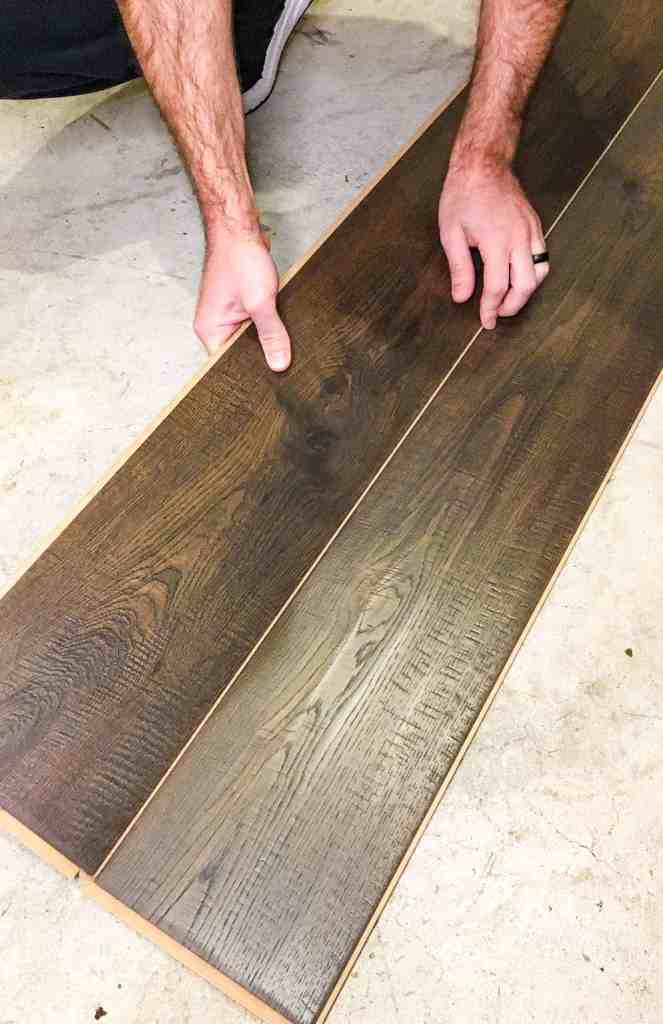
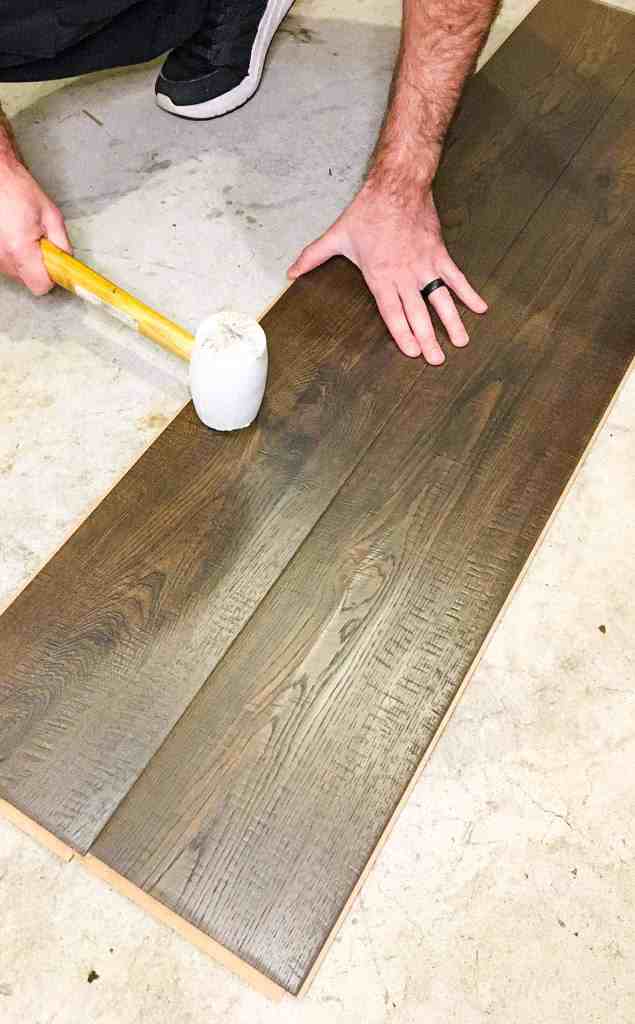
Installing Pergo is not hard, but you will want to read the instructions carefully to prevent gaps in your new flooring. When putting the tongue in the groove, I slid it in at 45 degree angle then pushed the board to ground, while maintaining pressure against the board.
Then I used a tapping block and a rubber mallet to make sure the boards were tight on both the long end and short end. I made sure there were absolutely no gaps in any of my boards and I tapped every single one, even if I knew it was tight.
It is critical that these boards are tight when they’re installed, and have the proper gapping where they meet the wall. If done right, it will look good, and last a very long time.
Best Direction to Install Pergo Flooring
When installing your first row, keep in mind which way you want the boards to lay. Installing flooring in a horizontal direction will make your room feel much smaller.
To make your room feel larger you could lay the flooring down in a vertical or a 45 degree angle. I recommend installing the boards long-ways or vertical with the sun that comes in your windows. Installing Pergo flooring in a vertical or diagonal direction will make your room feel larger.
Pergo Installation Kit
For this job, you’ll need spacers, a tapping block, and rubber mallet. I found entire install kit that had all of these tools to install Pergo laminate flooring. You will also need a Miter Saw or some type of laminate floor cutter to cut the boards to size.
I used a Miter Saw because I didn’t even know laminate floor cutters existed at the time. Using laminate floor cutters would have been easier and prevented a big mess.
The Pergo floors that I purchase came with padding on the bad, so I was able to lay it down with out adding the padding. If the Pergo flooring that you purchase does not come with a padding, check the recommendations on the back of the box before laying the floor down.
How to Install Pergo Flooring
To install snap and click Pergo floor, start laying the boards against one wall of your choosing, with the “tongue” part facing the wall. Now for any row, including this one, that “touches” a wall, will need the tongue or groove cut off because you want it to be flat.
To start, you need to cut off the tongue and that should be facing the wall so that the groove will still be in tact and looking out to the rest of the open room. The reason for this is because you want to be able to put another tongue into that groove.
Then use the spacers with the appropriate specs to make sure the boards don’t touch the wall. When you get down to the end of the wall and need to cut the first piece, make sure you cut to the length you need it BEFORE you cut off the tongue.
The remainder of that piece will start the next row, so you need the tongue in-tact. That same concept is how you’ll continue to lay these rows as you go.
When you cut the last board to fit size at the end of each row, the remaining piece will begin the next row, so on and so on.
Stagger Pergo Flooring
Make sure to stagger the seams of the Pergo Outlast as you lay it down. Staggering the snap and click flooring makes the floor look much more natural and prevents weak spots from forming.
There are many ways different patterns to install laminate flooring, but I prefer to stagger the flooring as this is the easiest.

Transition Strips for Pergo Laminate Flooring
It’s pretty much that easy to install these snap-and-click boards but you’ll also need to install transition strips when you’re done. You will need transition strips in areas that bump up against tile, carpet, or other wood floor.
I only have experience transitioning to tile, which is probably much harder than transitioning to carpet. There are different transition strips for different types of floor transitions (Pergo to carpet, Pergo to tile, Pergo to whatever else) so make sure you get the right one.
My flooring came in contact with tile in numerous places, and the tile was much higher than the Pergo floor, so I needed to improvise a bit. Then snap the transition strip “tongue”, on the underside of the transition strip, into the metal track using a rubber mallet, and you’re done.
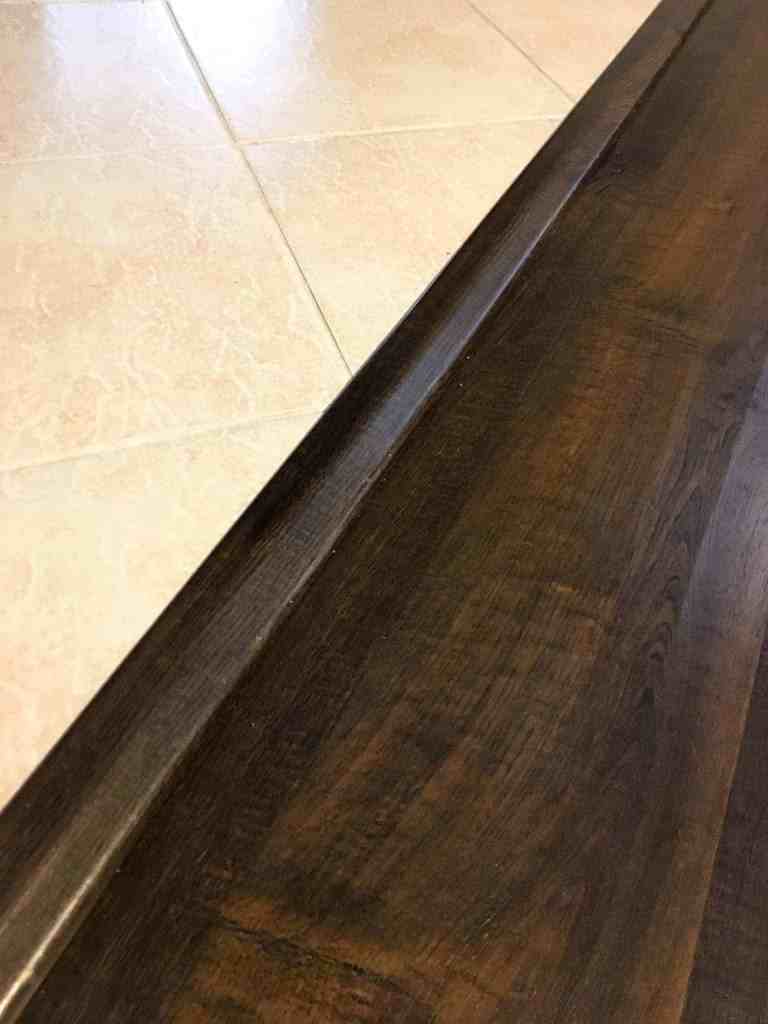
The problem I ran into was that the tile was too high so the transition strip tongue would never reach the metal track. To fix this, I just installed a piece of wood underneath the metal track first, to “boost” it up. After that, it fit great.
Another issue you might run into is uneven subfloor. If there is a high spot in your subfloor, you might have to sand down any bumps to get it as level as possible.
If there is a dip in your subfloor, you could use shims underneath the Pergo or other snap and click flooring to level it out. For more tips to a Pergo flooring installation, take a look at the manufacture website.
Conclusion
It’s been almost 7 years since my Pergo flooring installation and my floors still look great with out any gapping. Installing flooring yourself is a DIY that can save you a lot of money, and may even look better than a professional installation.