
A simple and cheap way to update your bedroom is to add a DIY fabric headboard behind the bed. This headboard is affordable and fun to make because you can put your own custom touch on the project.
How to Build a DIY Headboard
Making a headboard yourself will coast roughly $40 or less depending on the materials that you use.
The project can be completed in a couple or hours and can even be easily reupholstered if you want to change the style.

A DIY fabric headboard is a fun project because it is easy and you can get creative with the design.
This is the perfect project to go out of your element and select a bold fabric for the headboard.
The great thing about this DIY is that you can easily reupholster it if your style changes or you want to switch things up.
I originally made this headboard with navy fabric to match my theme, but after a couple of years I wanted to change it.
Step 1: Measure Plywood for the Headboard
If you have a bed lower to the ground, it will involve nothing more than buying a piece of plywood.
If your bed is higher, you can easily put legs on it or stack 2 pieces of plywood.
Make sure you get a piece of plywood (RTD, sanded plywood, etc.) that is close to ¾ inch thick so that it’s firm, and the standard size should be a 4×8 feet.
It doesn’t matter how ugly the piece of wood looks for your plywood headboard because it will get covered.
If you get the correct size, it should not require you to cut it at all.
A smaller bed may required that you cut the wood, so that it doesn’t overlap the bed too far.
Most home improvement stores will typically make cuts to plywood for free, if you need the plywood smaller.

Step 2: Add Padding to the Plywood Headboard
I recommend adding thick foam padding on the plywood for a softer headboard.
You can use foam padding from a craft store or even a cheap mattress topper.
The entire piece of plywood does not need to be covered all the way to the bottom because the bed will hide the lower portion of it.
However, do make sure it covers enough to actually wrap around the back.
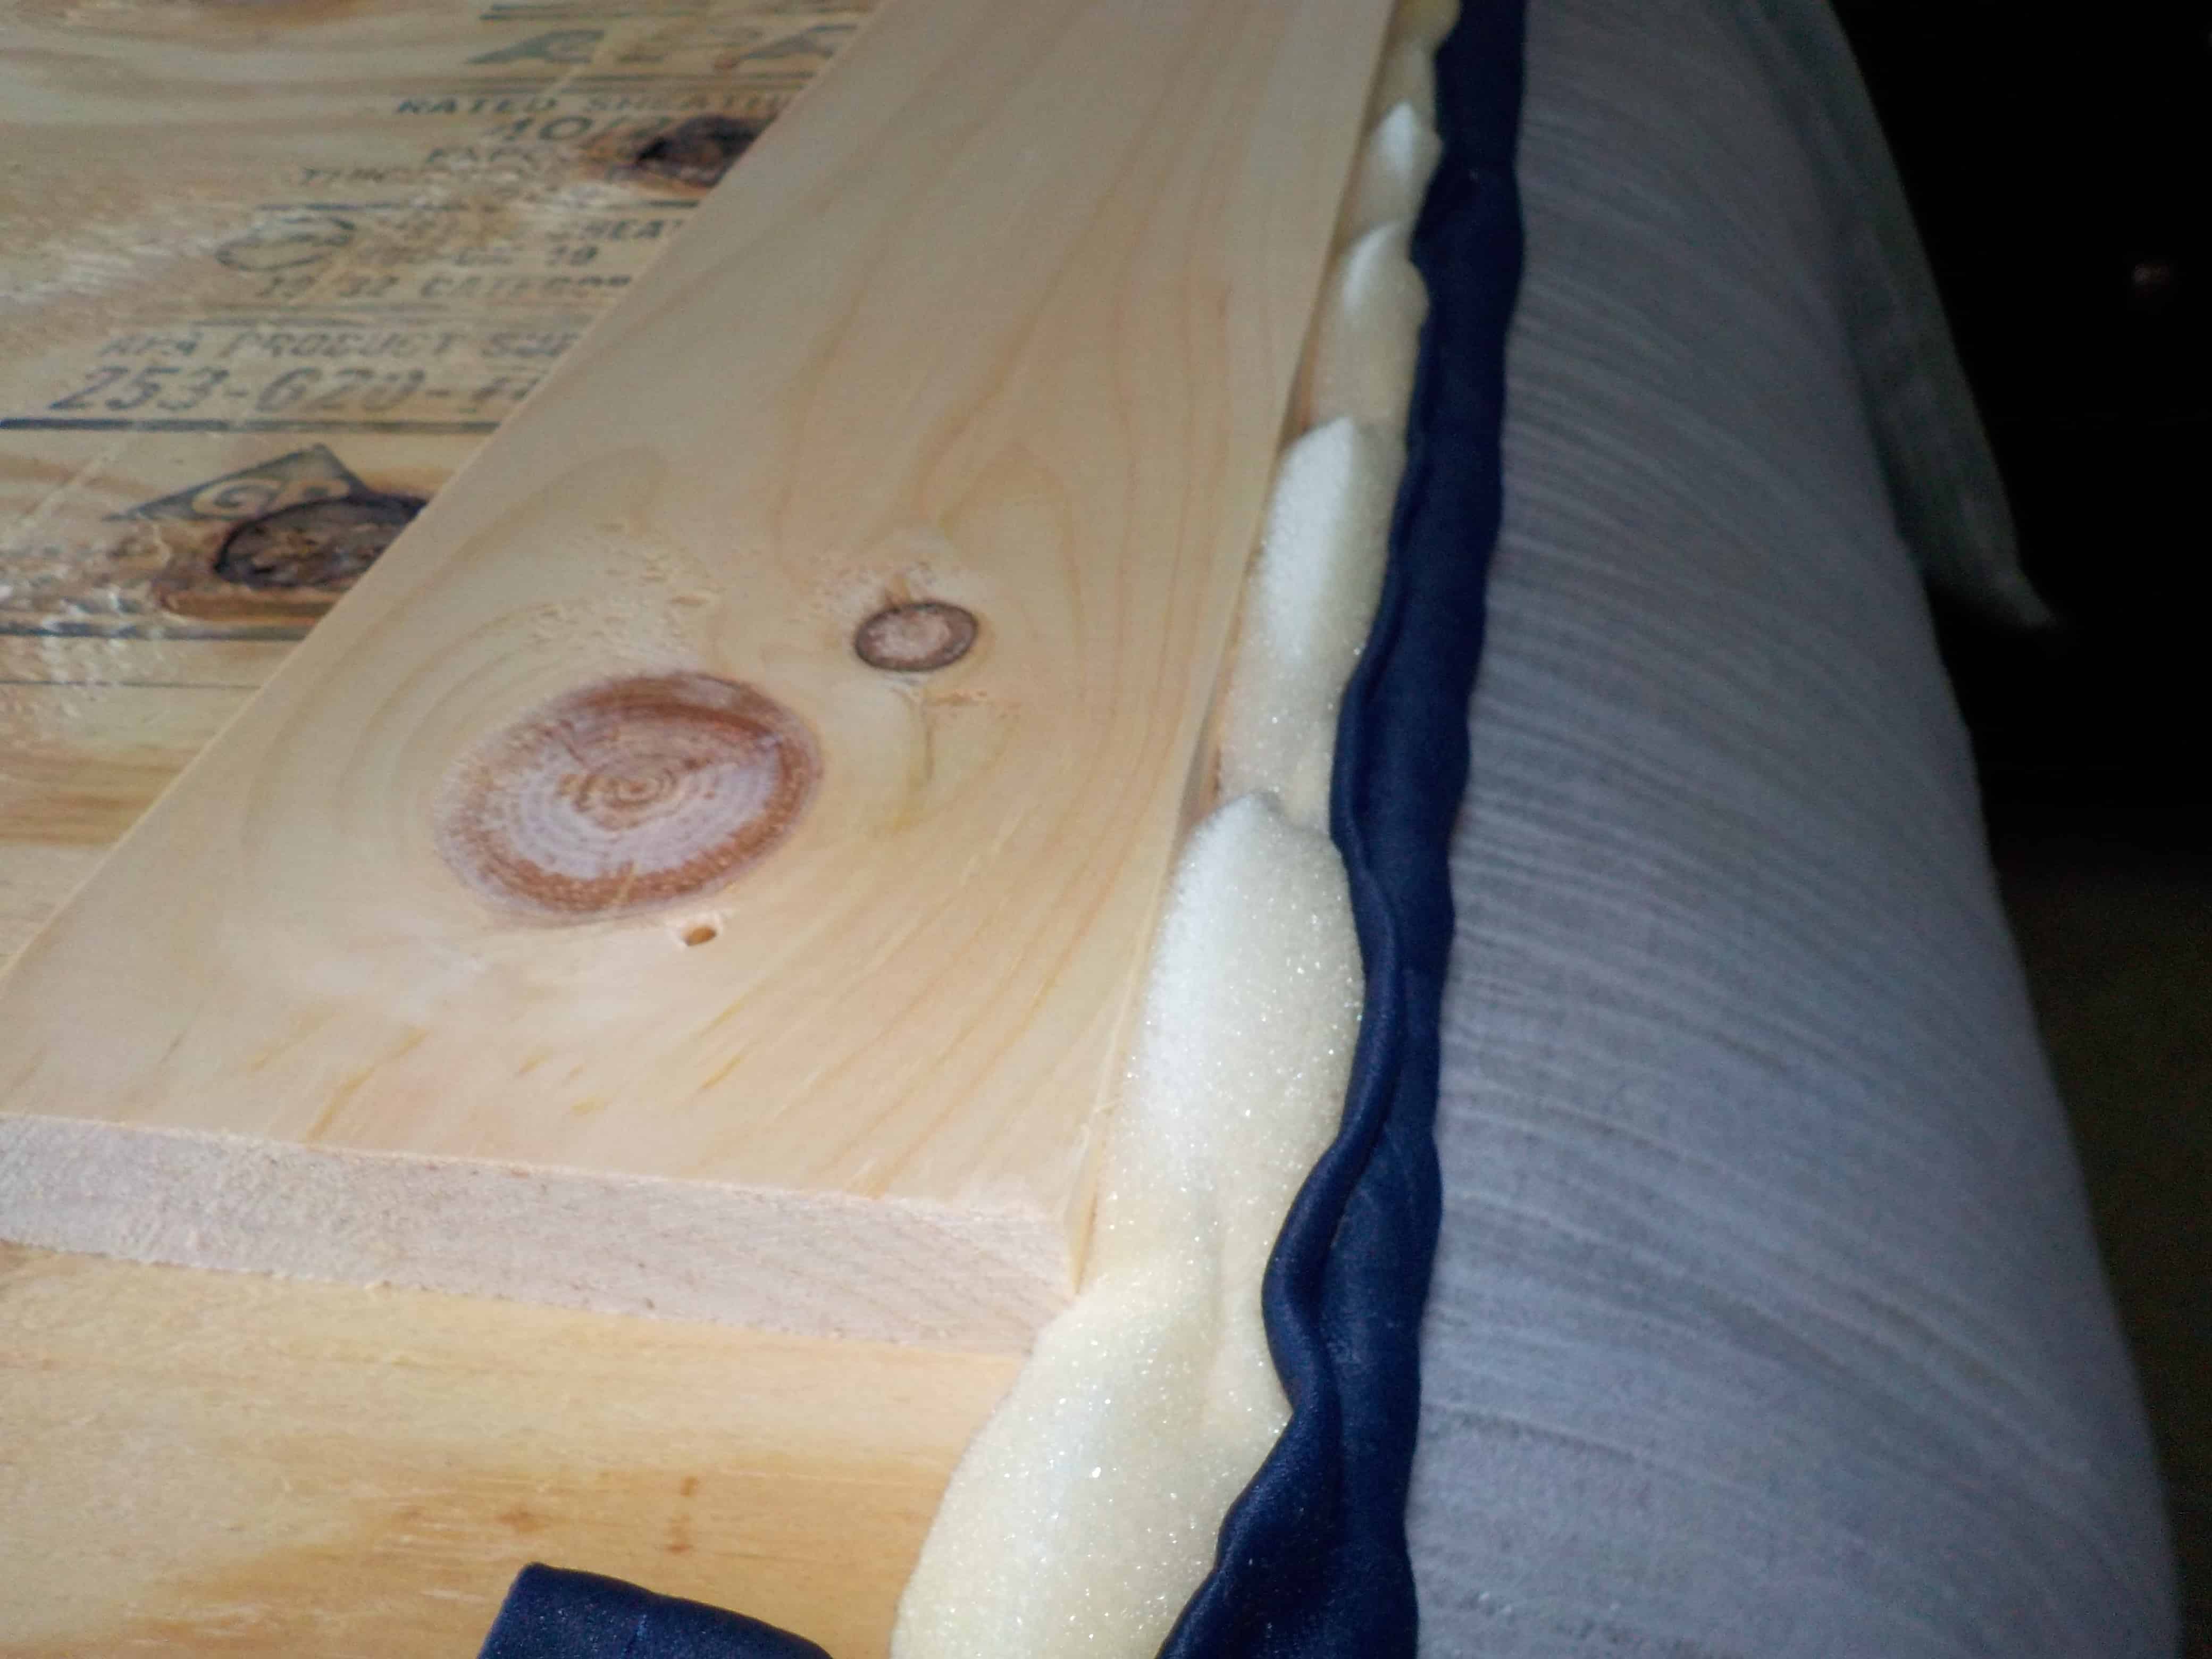
I used a mattress topper, since it’s cheaper and works fine for just resting my head against.
Make sure the topper is at least slightly longer that the headboard, so you can staple it behind the headboard
If your mattress topper is too short, you can cut the topper into two foam pads to cover the width.
Step 3: Upholstering the Headboard
The fabric for the headboard can be purchase from a craft store or you can use a durable curtain or sheet.
When selecting fabric for the headboard, make sure it’s longer than 8 feet wide so that it covers the entire width.
To upholster the headboard, lay the fabric out flat placing the plywood on top of the fabric.
Before attaching the fabric, adjust and smooth the fabric underneath the plywood then pull the fabric from one side so that it wraps around the back.
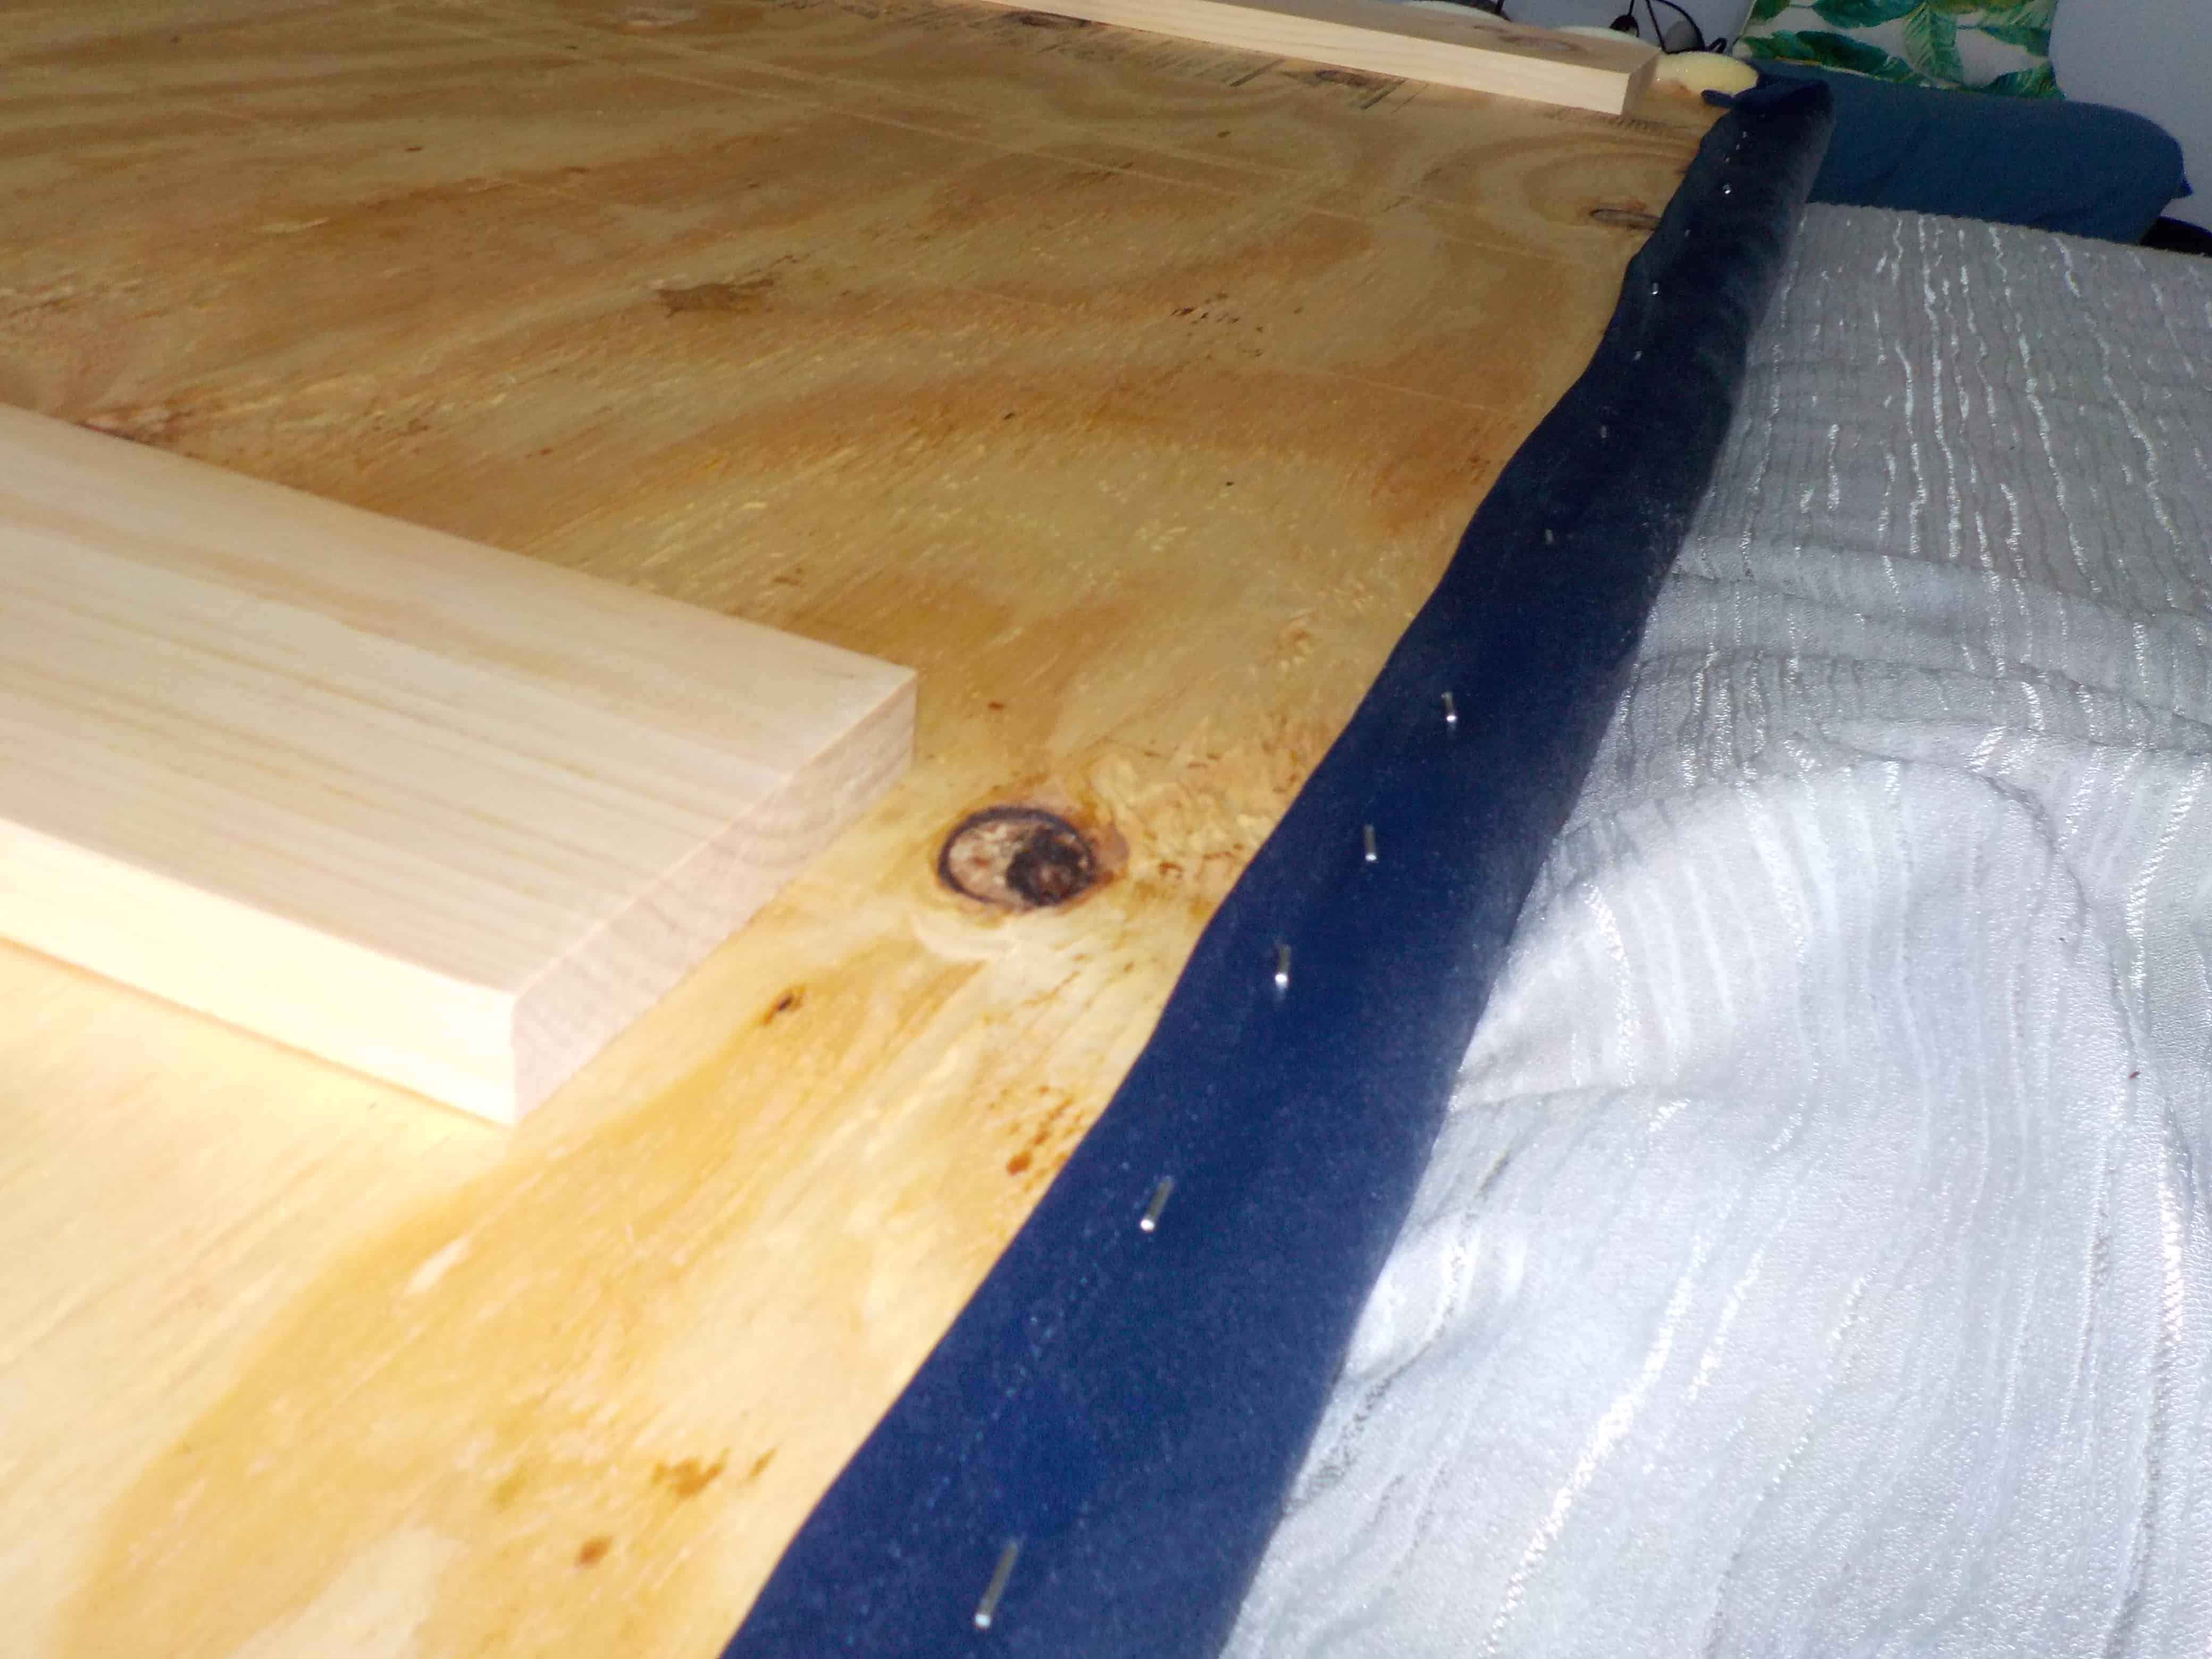
Using a staple gun work your way around while you pull the fabric in place. After one side is stapled, pull the other side taught.
Making sure not to pull too tight that it leaves wrinkle lines because you want it to look smooth.
Staple the other side in the back as well, and then go along the top with staples.
Flip it back over and try to work out any wrinkles before stapling the bottom of it.
Step 4: Adhering the Headboard to the Bed
To mount the plywood headboard, you will sandwich it between your bed and the wall.
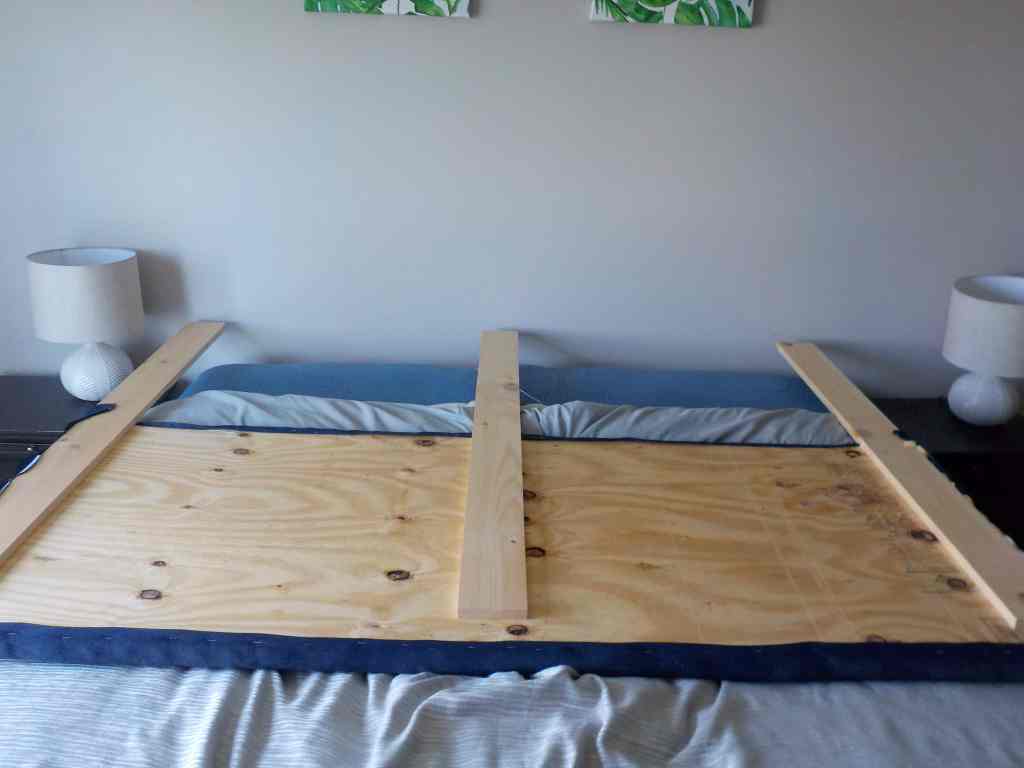
If your bed is higher, you’ll need to either put legs on it with 1×4’s or stack two pieces of plywood on top of each other.
You can attach “legs” by drilling in 1×4’s to the back of it. Make sure the screws don’t go through the front, so measure beforehand.

If you do go with this method, just make sure the legs are equal so that it’s level when you stand it up.
Another method of doing this is by stacking two pieces of plywood on top of each other and attaching them together with 1×4’s.
I recommend attaching these two pieces together before putting on the foam and fabric to make sure it goes down far enough to be covered by the bed.
Again, make sure the screws don’t come out the front.
Reupholstering Your DIY Fabric Headboard
If you get tired of your DIY Fabric headboard design, you can easily reupholster right over the existing fabric.

So, if you are feeling bold, go for a fun fabric because it can easily be changed out.
It is so easy to do, that I changed the look of my plywood headboard while my kids napped.
It is amazing what you can accomplish when you are under a time crunch.
If you are looking for more budget friendly bedroom makeovers, you will love these tips!

Conclusion
A DIY fabric headboard is a fun way to change the look of your bedroom in only a couple hours or less. For even more ways to update your bedroom, take a look at these other 51 ideas!