
Do you need a gift idea or a basket for a special occasion? Making a gift basket should be easy and fun, but it can be tricky to wrap the basket. Here are tricks on how to wrap a gift basket, so it looks like a pro did it!
Tips to Creating the Perfect Gift Basket
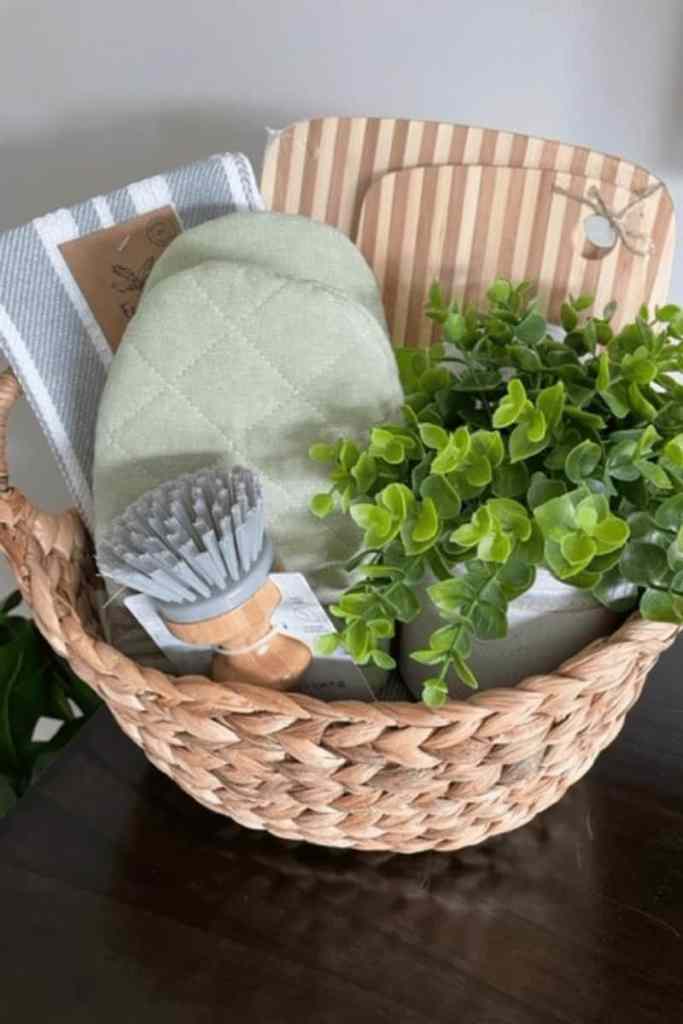
To create the perfect gift basket, start by placing taller items on either side of the basket to add symmetry.
The tallest items should be placed toward the back of the basket, so all items are visible inside the basket.
Then place tissue paper underneath the smaller items toward the front of the basket to help elevate the items and make the basket feel more full.
Tissue paper or another filler will help fluff up the basket and prevent items from falling to the bottom of the basket.
Tricks to a Cheap Gift Baskets – Color, Texture, & Pattern
To make a cheap gift basket, select a gift basket with rounded sides. A rounded basket is typically easier to fill and requires less items to nake it appear complete.
When shopping for your gift items, consider items with color to brighten up the basket and make it look more interesting.
Then find an item with texture like a fake plant and then find an item with a pattern or a pop of color to complete the look.
The items don’t all have to be overly practical, but they should keep the theme in mind and help fill up the basket.
Now that you have organized the items nicely in the gift basket, it is time to wrap the basket and add a bow on the top.
How to Wrap a Gift Basket
This step is totally optional, but it does make the basket look nice and keeps the items together.
All you need to wrap a gift basket is a roll of cellophane warp, a hair dryer, and twine or ribbon.
Consider a bright colored ribbon to coordinate with colors of items within your basket.
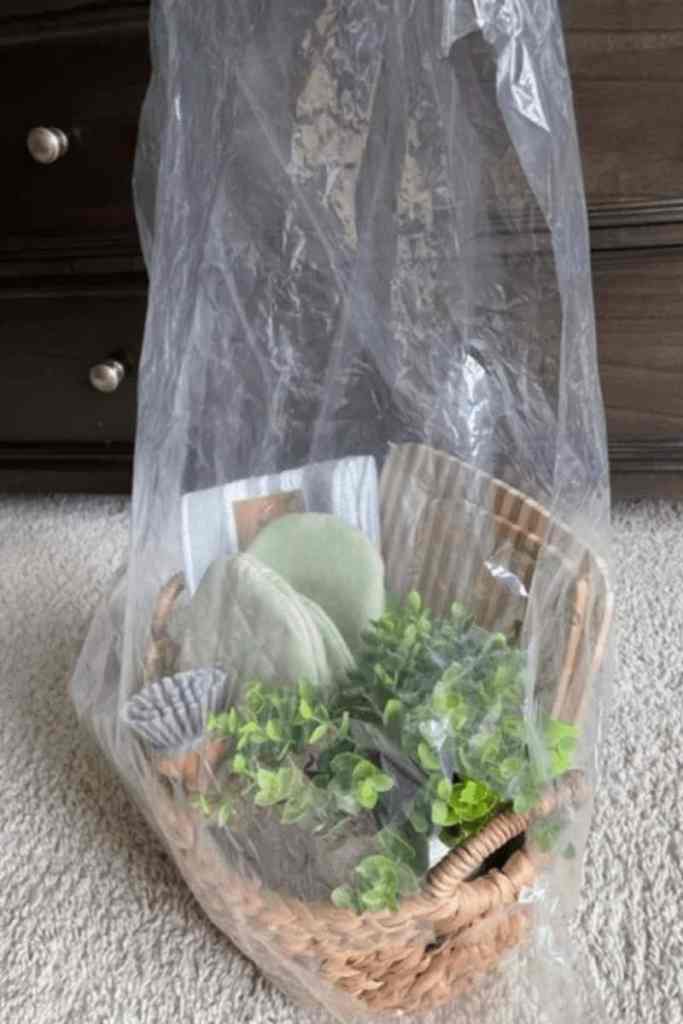
Sizing the Cellophane Wrap for the DIY Gift Basket
Before cutting the cellophane wrap, set the basket on top of the unraveled cellophane to determine the size.
Wrap the cellophane up and over top of the basket making sure you have enough overlap.
Once you have enough coverage, cut the cellophane slightly longer to leave room for error.
Then rearrange the basket in the center of the cellophane again and make the items in the basket did not shift as well.
How to Use a Hair Dryer on Cellophane Wrap
Now that everything is in place, bunch up the cellophane at the top and hold it in one hand.
With the other hand turn on the hair dryer on low and point it about 6-10 inches from the cellophane.
The cellophane will start to shrink and snuggly wrap around the basket.
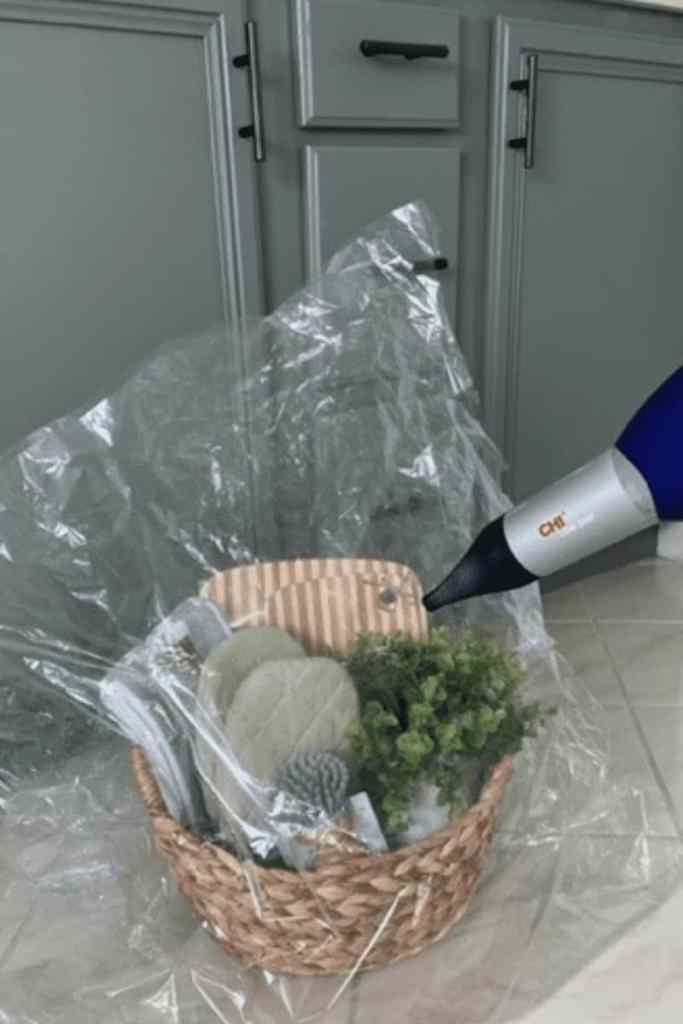
Slowly work your way around the gift basket until the basket is completely wrapped in cellophane.
If there are any areas that you aren’t satisfied with, use hair dryer again to smooth the cellophane.
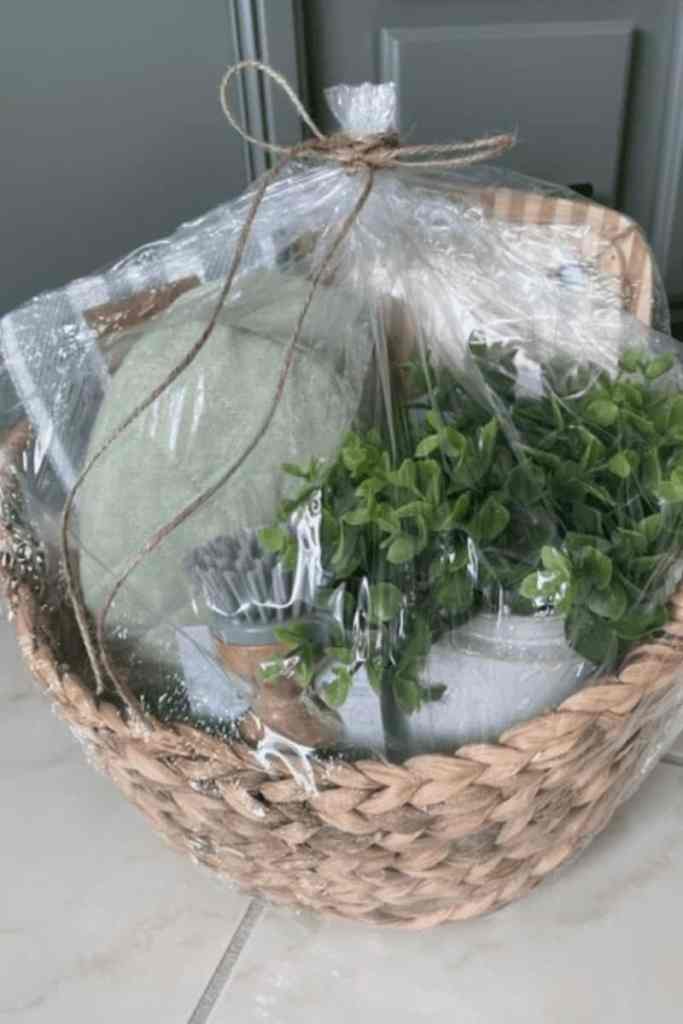
Once you are happy with the final look of the basket, gather the cellophane at the top nicely. Then grab a ribbon or piece of twine and secure it around the cellophane.
Cut any excess cellophane, if you have a large amount over flowing and adjust the ribbon or twine if needed.
Be sure to watch the video to get a better understanding of how to wrap a gift basket with cellophane wrap.
You might also find this post helpful to wrap Christmas gift baskets.
Auction Basket Ideas
This basket would be a great option for a silent auction or you might like these other basket ideas. These basket ideas are creative and would be an excellent gift or a nice item to bring to a beef and beer.